
Workflow Part 3 – Action Types
In part 1 of this series we focused on the basics of workflow and how to get started creating simple workflows. In part 2 of this series we focused on Follow-Up Actions, Assign/Complete Actions, Multi-Condition Triggers and Advanced User/Team Assignments. In Workflow Part 3 we will focus on the Action Types that are available in the User Buttons, Follow-Up Actions, Assignment Actions and Completion Actions areas.
Record/Document Field Update
The Record Field Update action updates a variable in the current Record. The Document Variable Update action updates a variable in the current Document (which can have its own data values / fields). Other than that, they do the same thing.
This is used for scenarios like status field updates and date/time logging. However, the uses are almost endless. Any time you need to set a variable in the Record you can use this action type. When you select Record/Document Variable Update as the action type the screen will refresh and you are given a few options to configure to perform this action.

The “Field Name” field allows you to enter the name of the field. If the field is available in a Record Type, you can use the Folder icon to select the proper Record Type then use the Field icon to select the field. If the field is not in a Record Type, then just type its name into the text blank.
REMEMBER: You do not need to have a defined field in the Record Type in order to set a field’s value. Each Record has an unlimited number of fields it can have and whether it is defined at the Record Type level is not important. This means you can tag tracking information into any Record regardless of its Record Type. Since most users only see what is “defined” they will not be able to see this tracking information, but it will be searchable!
The “Field Value” field allows you specify what value to assign to the field you named previously. You can enter any value you would like, or you can use the Variables icon to select a predefined variable. There are several variables available along with the top one in the list which is “Delete Variable from the Record.” This option will actually remove the field completely instead of updating it.
The “Line Number” field allows you to specify which line number to write the value. If you are working with line-item fields, this can come in very handy. You can also place this into one of our looping actions for more advanced updating of line-item values.
Send Email
The Send Email action will send an email as part of the work item action. When selecting this action you really only have one option to Edit the email. Clicking this option will open the email editor.
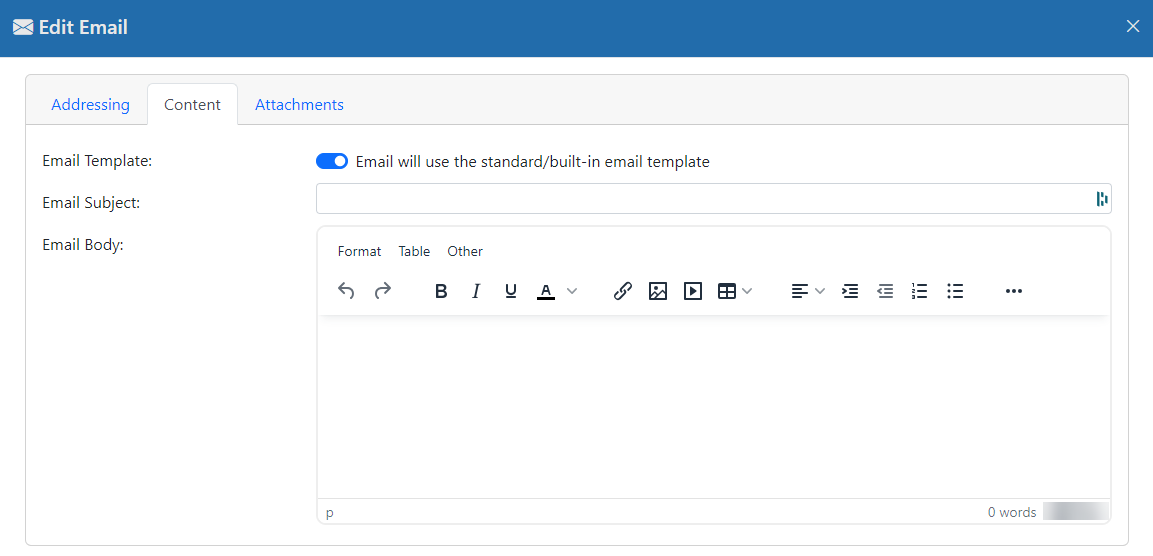
You can now fill out the From, Subject and Body fields as needed to set up the email. The Email Template option allows you to embed your email into the standard email template. This will include a header and a formatted color bar on the left. The details of the template are definable so you will want to review the defined template to make your decision. If you elect to NOT use the template, then your email will be a plain email with only your specific formatting.
When selecting the From, To, CC and BCC fields you can use defined variables or you can simply type in the value you desire. A common use is the “Assigned Users’ Email Addresses” option that addresses the email to the users who are currently assigned. Another use may be to enter a field name and read an email address from the Record data by using brackets around the value – such as “[EMAILTO]” as a value.
Merge Document Template
The Merge Document Template option allows you to have document templates merged into documents during workflow. In order to enable this, you must have created and saved at least one template to the server. You can use Word, PDF, or even Excel as templates The Word Add-In allows you to create a Word document that has placeholders in it for data to be merged into. Examples of this could be customer receipts for service, invoices, thank you letters, denial letters, employee benefit statements and more. You can refer to the Document Merge Templates article for more details.
The basic use is simple. You select a template to merge and give it a name in the Document Name field. The template is merged using data from the current Record. The resulting document is saved into the Record and is named whatever name you give it here. You also have the option to convert the word document to a PDF before saving.
Create Portal Package
Portal packages allow you to share information with or request information from the outside world. For a more complete explanation of Portals, please refer to this article. This action type allows you to automatically create a Portal Package and send that out to an outside user. An example of this would be to take the merged document from the Merge Document section above and share it with your outside user.
In this screen you simply select the Package to create from the list. You can then click the Edit button to edit the outgoing email notifying the user(s) of their new portal. In the email edit screen you can set the usual From, To, CC and BCC. You can also set a couple other options.
Password allows you to specify whether or not to include the portal password in the email. This is not good practice for security reasons but there are times when it may be prudent. If you do not include it in the email you will need to give them the password another way.
Workflow is designed to allow the outside user to participate in workflow. This means they willl see the workflow buttons on the portal page and can click one of them to move the workflow along.
Create E-Form
With the Create E-Form action you can have the system automatically add an E-Form from the E-Form library to the current Record. This is very straight forward in that you simply select the E-Form to create from the list.
Approve E-Form
When E-Forms are saved into the system you can elect to have them require approval for the data to get committed to the Record. If you have that scenario then this action will allow you to approve the E-Form so its contents can be saved into the Record. For this action you must select which E-Form to approve from the list provided. If that E-Form does not exist in the Record then this action is skipped.
Lock E-Form
E-Forms remain editable as long as they are not locked. In many processes there is usually a cut-off point where the E-Form should not be edited once an approval is done or a sign off has occurred. This action type will allow you to lock an E-Form so it can no longer be edited. For this action you must select which E-Form to approve from the list provided. If that E-Form does not exist in the Record then this action is skipped.
Cancel Work Item
There are times when the users need the option to completely cancel the current work item. For instance, if a duplicate invoice is sent through AP processing then that item needs to be stopped. It might be simple enough to change a variable and have the invoice drop out. But if that gets too complicated then there are times when the work item just needs to stop regardless of the variables. That is where this action type comes in. As a side note, it is typically a good idea to do a variable update or add a new Record note to alert users why the work item was stopped.
Add Record/Document Note
With this action you add new notes to the Record or Document. You can put any text information in the notes you need, and they are entered as though a user actually typed them in. These notes, like many parts of the system, can use variables.
When adding Record notes, the note will be added to the Record level data and will show up in the Record’s notes. The note will be logged as being added by the current user. This means that if you click a button and the workflow behind the scenes creates a note it will have your name assigned to it.
The Document Notes option works similarly except the notes are added to the Document level data. This will only work if an actual Document is being routed. If the entire Record is being routed, then Document notes will not be written if you select Document notes because the system will not know to which Document to assign the note.
Assign Asset
If Asset tracking is turned on then workflow can work with your asset management functions. This action is used to Assign assets to users based on workflow rules. Use this to assign an asset to the current user when they click a work item action button or maybe during a follow up action.
Return Asset
If Asset tracking is turned on then workflow can work with your asset management functions. This action is used to Return a specific asset based on workflow rules. Use this to return an asset when a user clicks a work item action button or maybe during a follow up action.
Summary
This wraps up the Action Types available in the Work Triggers. As we add more features we will keep this article updated with the current information.
Workflow Part 1 – Introduction to the Basics