
docMgt allows all types of content to be stored into and retrieved from its repository. We have tools that allow users to import and scan documents right from the browser. Users can also drag and drop documents directly into the browser to file them away. If you are saving office documents into docMgt you have one better option.
We created our Office Integration Tools to allow users to save office documents directly from Microsoft Office applications into docMgt. In this article, you’ll learn how to save files from Microsoft’s Word, Excel into your docMgt site using the Microsoft Office Integration. Please note, the system requirements of a locally installed Microsoft Office 2013 or higher. This does not work when using Office as a browser application.
Where to Find The Save Option
When saving office documents into docMgt, the process is identical for both Word documents and Excel workbooks.


Select the “File” button in the upper left hand corner of either Microsoft Word or Excel ribbon / toolbar to start the saving process.
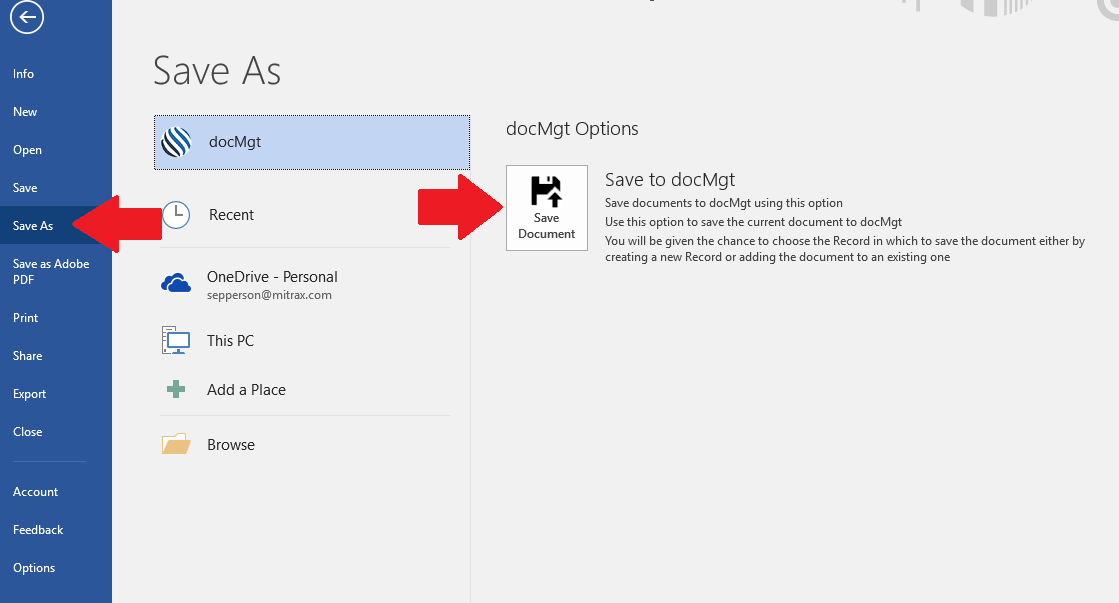
Click to “Save As’ option on the left-hand side to be presented with your available “Save As” options. The options you see will depend on what other utilities you have installed but will be similar to the screen shot above. Click the “docMgt” option in the list then click the “Save to docMgt” button on the right.
The Saving Process
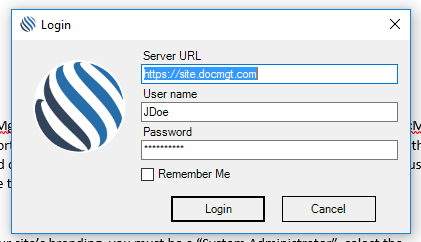
If you are not already logged in, you will be prompted to enter your login credentials for your docMgt site. Enter the URL to your docMgt site, followed by User name and Password. Press Login.
Next, you’ll be given options to select where/how you’d like to save your document in docMgt. Here are the available options:
- Favorites – Clicking this button will list all the Records in docMgt that you have marked as your favorites. You can click any of then to select that Record and move to the next screen.
- Last Search – Clicking this button will list all the Records in docMgt from the last search you performed in docMgt. You can click any of then to select that Record and move to the next screen.
- Last Viewed – This automatically selects the last Record that you viewed in docMgt.
- Custom Search – This will present you with a search form where you can perform a search to find the Record into which you wish to stored your document / workbook.
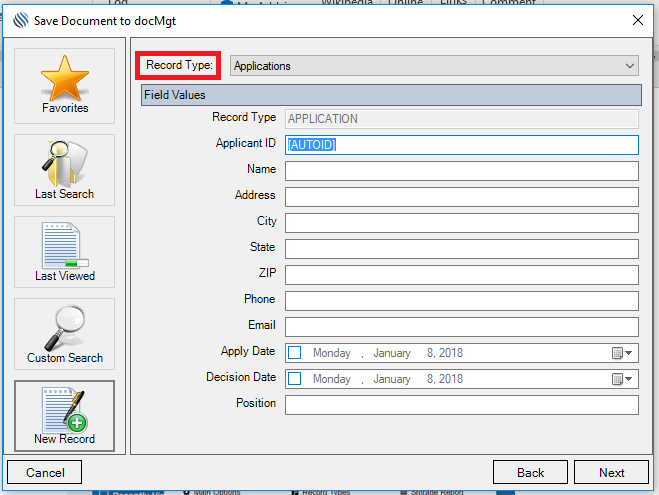
- New Record – This will present you with an entry form where you can enter a new Record into which you wish to stored your document.
For the example above we selected “New Record”. Select the Record Type in which to save the document, followed by the selected Record Type’s entry fields. After entering in the data, select Next.
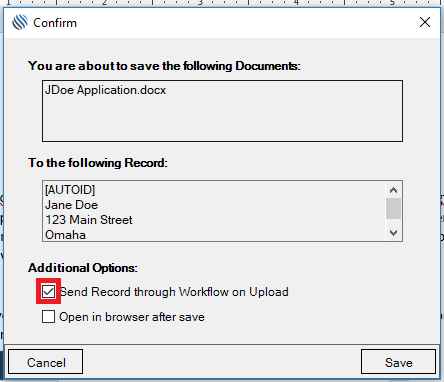
Finally, you’ll arrive at a confirmation page. Here you’ll review the details of the Document or Workbook that will be saved to docMgt. You have 2 extra option you can select just before saving.
- Send Record through Workflow on Upload – This option will first save the document and then will send that document into the workflow engine to be routed. In order to properly use this option you must have workflow configured in docMgt.
- Open in browser after save – This option will first save the document and then will open that document in your web browser. This is handy if you want to do more work on the document once it is in the system.
Summary
There you have it! Saving files from Microsoft Word and Excel to docMgt made easy. For further docMgt reading, please visit the Articles page on our website!
Related Articles