
Record Types
The concept of Record Types in document management systems is nothing new. In fact, the ability to classify and separate documents based on type or usage is what makes system more usable than just throwing everything together with no means of telling what types of documents are present. However, docMgt goes about defining Record Types a little bit differently than other systems.
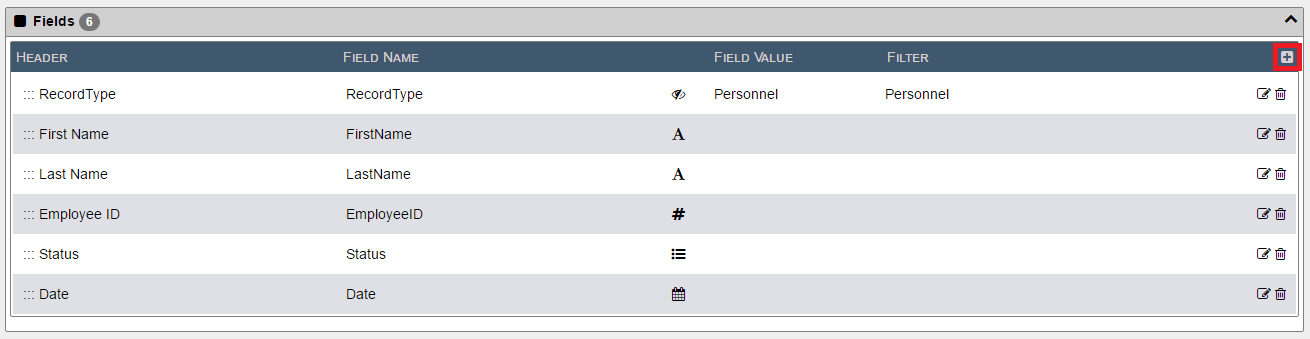
Record Types in docMgt are not dictated by which area of the system you place them and they are not dictated by the security level of the person doing the work. In docMgt the Record Type is dictated by what we know about the information in the Record. For instance, if a Record comes into the system with fields named First Name, Last Name, Employee ID and Hire Date we can be fairly sure that this is an Employee Personnel Record. Likewise, if a Record comes has fields of PO Number, PO Date, PO Amount and Vendor we are probably fairly certain this is a Purchase Order Record. Of course, you can always change these parameters to reflect your own needs but the concept remains the same.
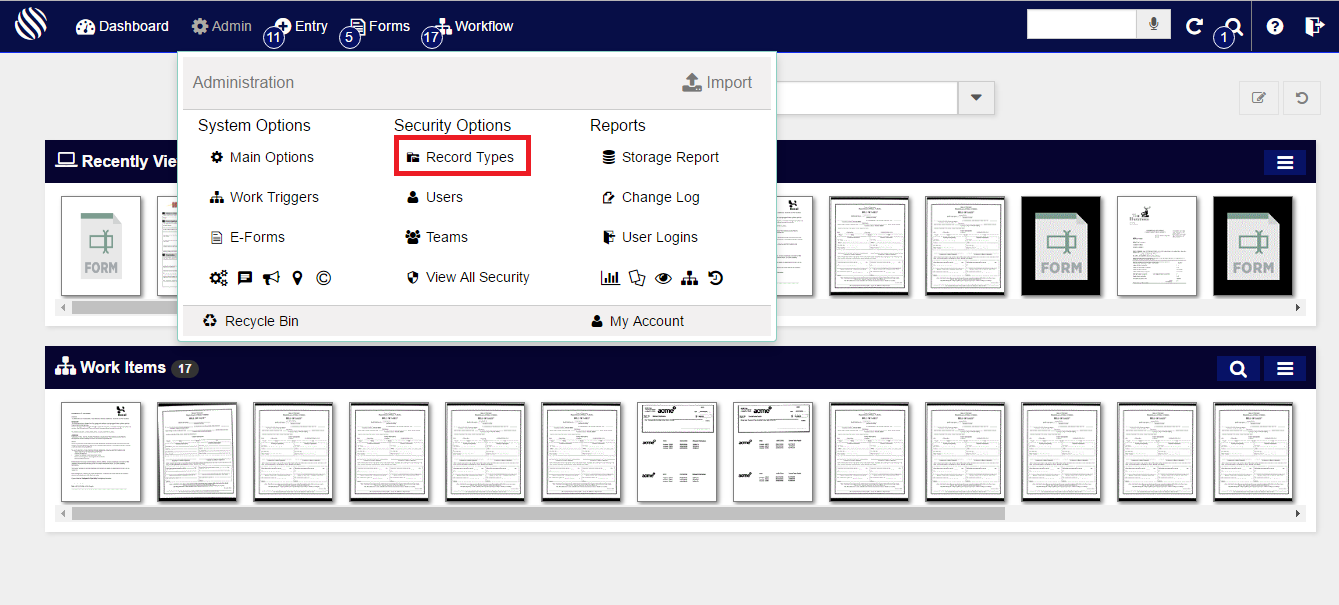
When you select “Record Types” from the admin screen you will see a list of Record Types that have already been defined if there are any at this point.
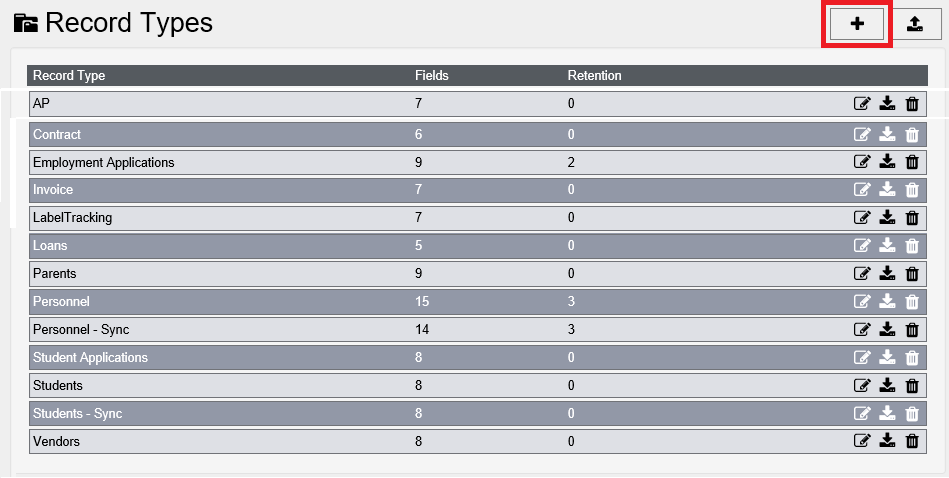
To add a new Record Type, click the [icon name=”plus-square-o” class=”” unprefixed_class=””] button. You can also import any Record Types that were previously exported from this or any other docMgt system using the [icon name=”upload” class=”” unprefixed_class=””] button. To edit an existing Record Type, click anywhere on the row for that Record Type or click its [icon name=”pencil-square-o” class=”” unprefixed_class=””] button to proceed to the edit screen. To delete an existing Record Type, click the [icon name=”trash” class=”” unprefixed_class=””] icon in the row. To export a Record Type click on the [icon name=”download” class=”” unprefixed_class=””] icon in the row.
General Settings
The General Settings section allows you to set the standard properties of the Record Type. These define the general use and overall purpose of the Record Type.
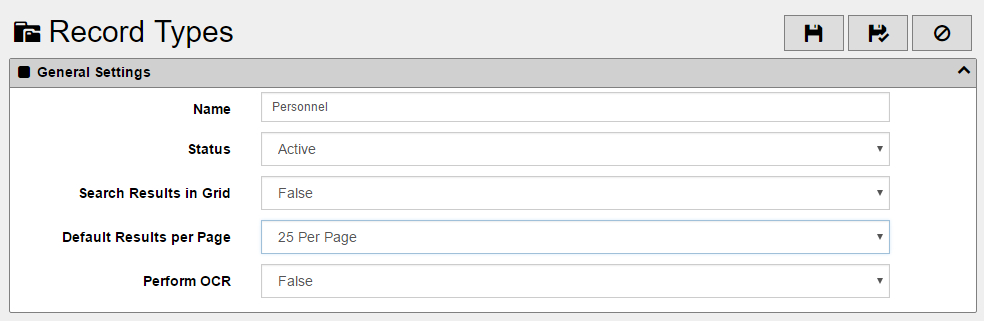
Name – Set the Name of the Record Type here. Name it in a way that makes sense to you and your users. This name is used later for Entry selections and Search selections throughout the system so name it something that is easily identifiable.
Status – Set to ACTIVE to allow this Record Type to be used. Set to INACTIVE to define the Record Type but not allow it to be used until you set it to ACTIVE at a later time. With this option, you can sunset a Record Type without having to lose the information about how it was organized or you can prototype a new Record Type without having it show up for active users.
Search Results in Grid – Set to TRUE to have the results show in a grid format. Set to FALSE to show the default which is a more free-flowing, Goggle-like results list.
Default Results per Page – Specify the number of search results to show per page. Keep in mind that the smaller the number the faster the search pages load.
Perform OCR – Set to TRUE to tell the OCR system to OCR all documents after they are saved into the system. If you are self-hosting the server (i.e. not in our Cloud infrastructure) then you will need to ensure the OCR agent is configured and running properly.
Security
Security allows you to specify what rights users and groups have regarding Records within this Record Type. Specify the Users and Teams that have each level of access in the proper spaces.
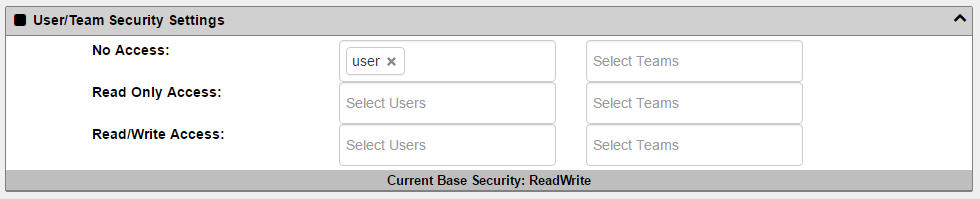
No Access – Users/Teams will not even see these Records
Read Only Access – Users/Teams will see and view information but will not be able to change it
Read/Write Access – Users/Teams will be able to view and edit information
Fields
Fields are used to define the types of data that will be stored in these Records. You supply a Name and Type at a minimum.
BE CAREFUL: There are a few Field Names that are reserved for special purposes so should not be used in your definition. The reserved Names are:
- RecordID
- SearchString
- Unindexed
- Anything that starts with __ (2 underscore characters)
Fields are also how the system determines what Record Type any given Record is. By looking at the Fields of a Record and the values contained within the Fields, the system can tell what the Record Type is and can apply the proper Entry and Search screens. This is done by using the Filter Values for the Fields. See a full explanation below.
To add a Record Type field, select the [icon name=”plus-square-o” class=”” unprefixed_class=””] button. To edit an existing field, select the [icon name=”pencil-square-o” class=”” unprefixed_class=””] button. If you wish to remove any created Record Type fields press the [icon name=”trash-o” class=”” unprefixed_class=””] button.
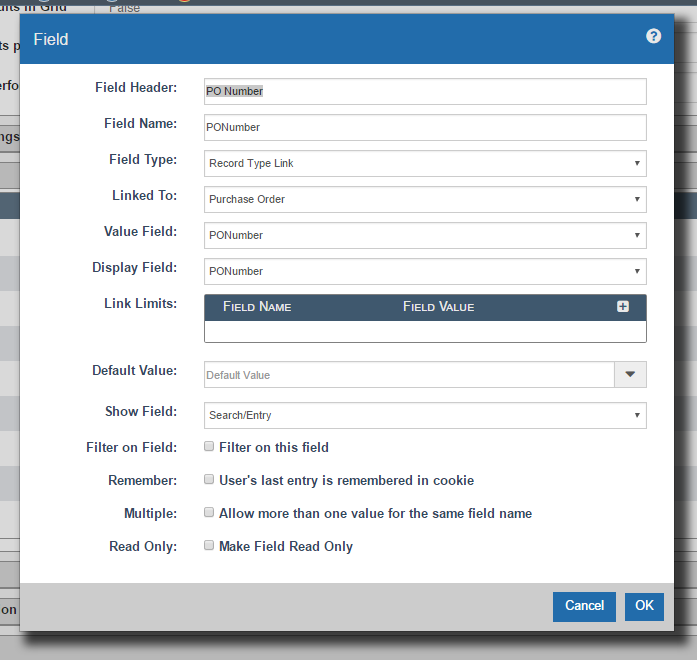
When you add/edit a field you have several options.

As you’ll see above you have several options including:
Field Header – The Field Name that the end users see in all screens. This is a descriptive Field Name.
Field Name – The actual name of the field as the system sees it (the name used to import the Record might be “EmpNum” but you would use a header or “Employee #” to make it more readable to users).
Field Type – The type of information to be stored in this Field (Hidden, Text, Numeric, Date, Option, AutoID, Record Type Link). This is used to build the correct entry/search screen types as well as to define how searches work against this Field.
In this example in a Personnel Record Type:
- First Name = Text
- Employee ID = Numeric
- Status = Option
- Date = Date
Default Value – When entering new Records, you can default a value for the users to save them time
Show Field – The places where this field will show up. You can use the field for Entry, Search or both or only for applying a filter. If you specify Search, then the Field will be shown to users on the Search screen but not in the Entry screen. Using Entry does the opposite.
Filter on Field – Whether or not to filter the Records based on this Field.
Filter Value – The value that needs to be in this Field for the system to associate the Record with this Record Type. If Date or Numeric values are used in both the Filter Value and Filter Value To then the Record value must be >= (greater than or equal to) this value to match.
Filter Value To – Only used for Date or Numeric values. The Record value must be <= (less than or equal to) this value to match.
Remember -To remember the last added value for this field. The value is saved for only the current user and only on the current computer. This allows each user to have their own last value. This is very useful for situations where repetitive data is being entered. This is saved in a cookie on the user’s workstation so be careful that you don’t use this for sensitive data because cookies are not secure.
Multiple – Whether or not to allow multiple values for this field. In the associated entry screens, the user will have a button that will allow them to add as many of these fields as they need. This is useful for situations like tracking Invoices that a check has paid since there could be many invoices for that one check. In this example you would add a new copy of the Invoice # field while you are doing entry.
Read Only – Whether to allow the end users to enter any data into the Field or not. You can default a value and set it read only so the users can see the value but not change it. You can achieve a similar effect by using a hidden field except the users wouldn’t able to see the value during entry or view.
Lookup Data
Lookup Data is a very handy tool when using multiple Record Types that you wish to “Link”. In the example below you’ll see that the Record Type called Check has a field that is linked to the Purchase Order Record Type.
Due to a link being used in the Check Record Type field called Purchase Order Number, one can now use a created PO Number from the PO Record Type and link it to the Check entry.
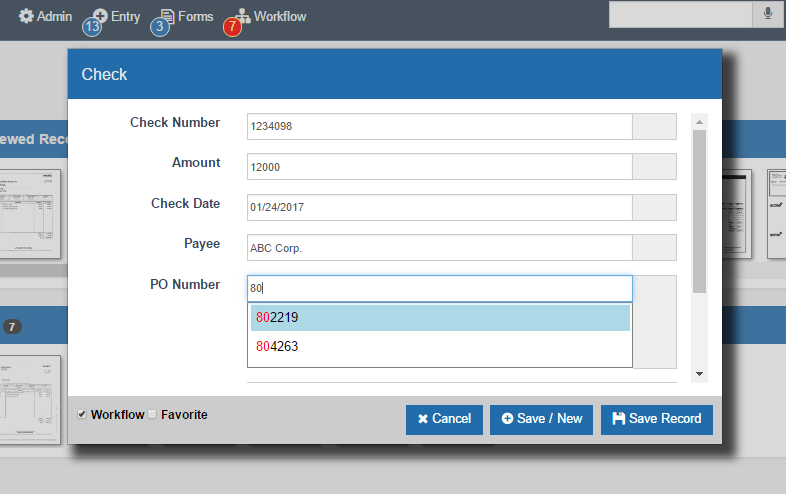
Here you’ll see that the system was able to find a previously created PO Number, that I can now use for my entry of a Check.
Defined Documents
This section is used if the Record Type is such that there are Documents that are often affiliated with the Record Type. A defined document can be required in order complete a Record. Examples of Record Types that meet this requirement might be Personnel Records, Invoices and Student Records. Each of these Record Types can have a list of Required Documents within the Defined Documents so at any time a Missing Documents Report can be run to show which Records of that type have missing Documents.
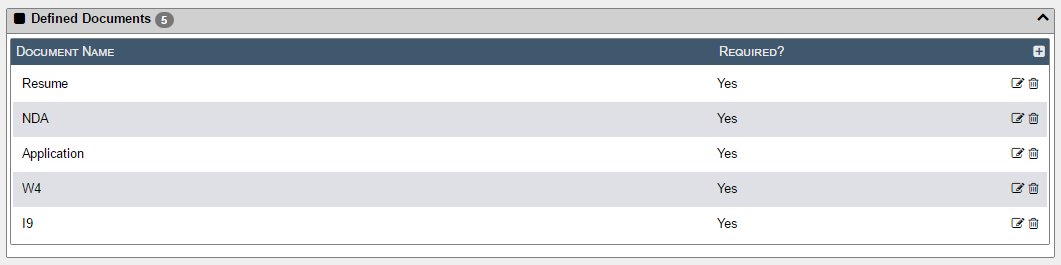
In the above example, there are 5 documents that are recognized to be associated with this Record Type. If any of the five Defined Documents are Required then those documents must be present in the Record, when this occurs that record is said to be “complete” and it will NOT be on the Missing Documents report. If any of the required documents are missing, then the record is “incomplete” and will show up on the Missing Documents report.
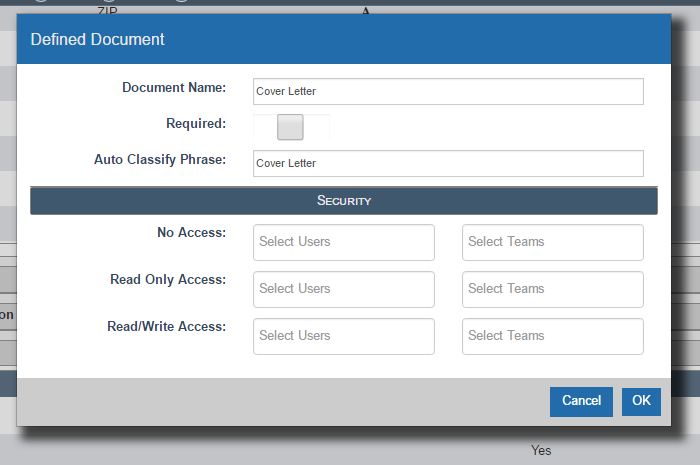
When you Add/Edit a Defined Document value you will have a screen that pops up to allow you to specify the name of the Document to require.
You can also specify an Auto Classify Phrase of up to 3 words. When using the Classify process in Indexing Automation this value will be used to automatically find classification matches. The OCR data in the documents is compared to the value entered in the Auto Classify Phrase and if a match is found then those pages are associated with this Required Document type.
Summary
And that’s how it’s done! Stay tuned for a more comprehensive blog surrounding Record Types!