Printing a Document
Even though you are using a leading edge document management system like docMgt we all have the need for physical copies of documents from time to time. Well have no fear because printing a document in docMgt is easy to do. Follow the steps in this article to print that Document.
Selecting a Document
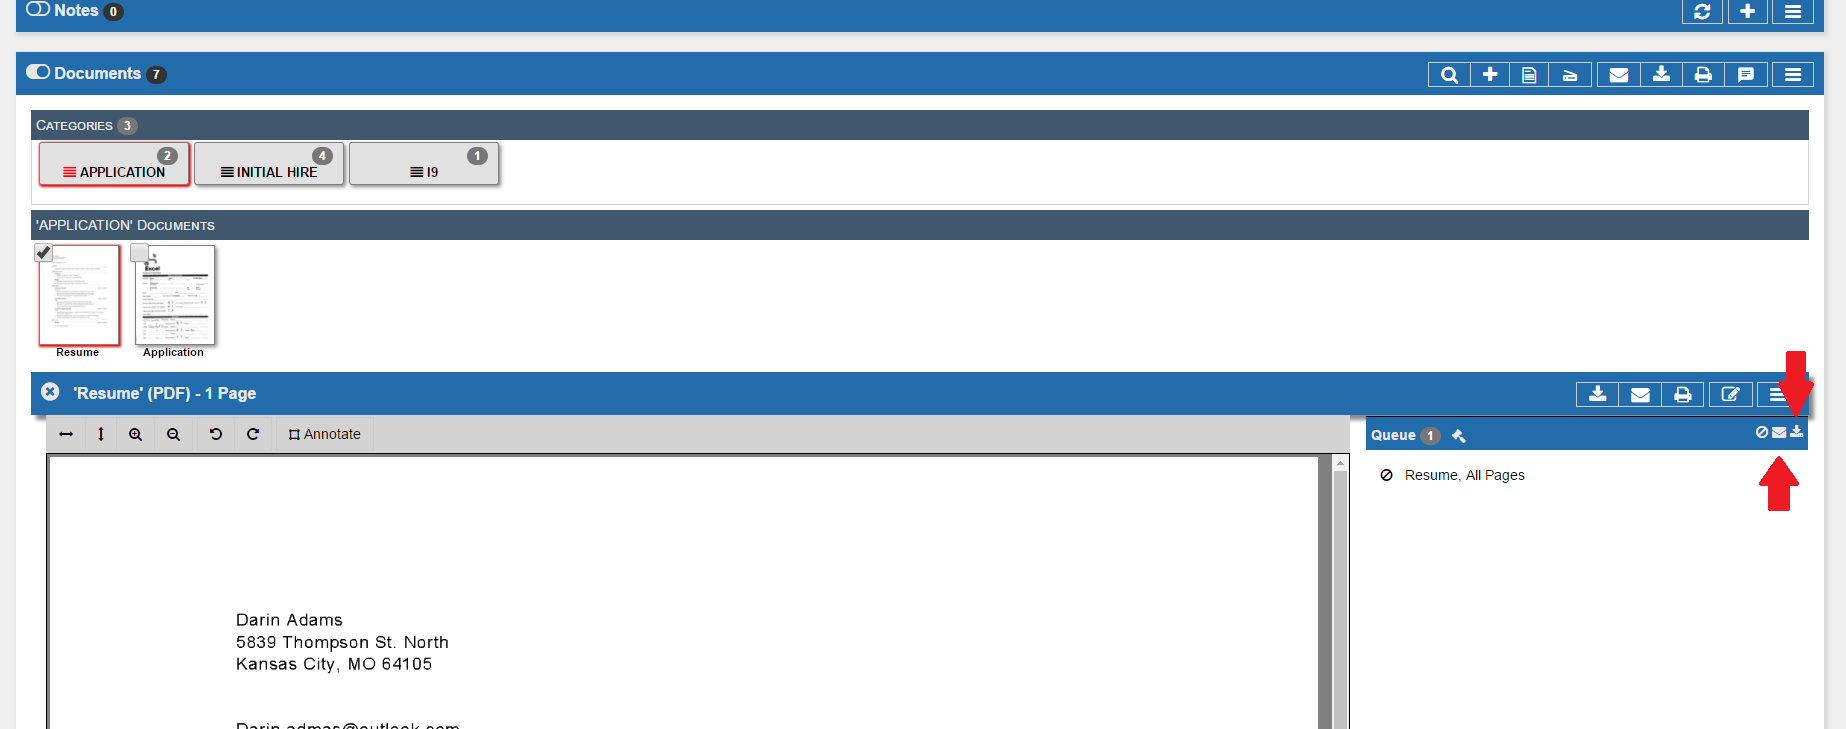
First, let’s select the Document we wish to print. In this example we will be printing the Resume Document. Open the document by clicking on its thumbnail. Once it is open click the [icon name=”print” class=”” unprefixed_class=””] button.
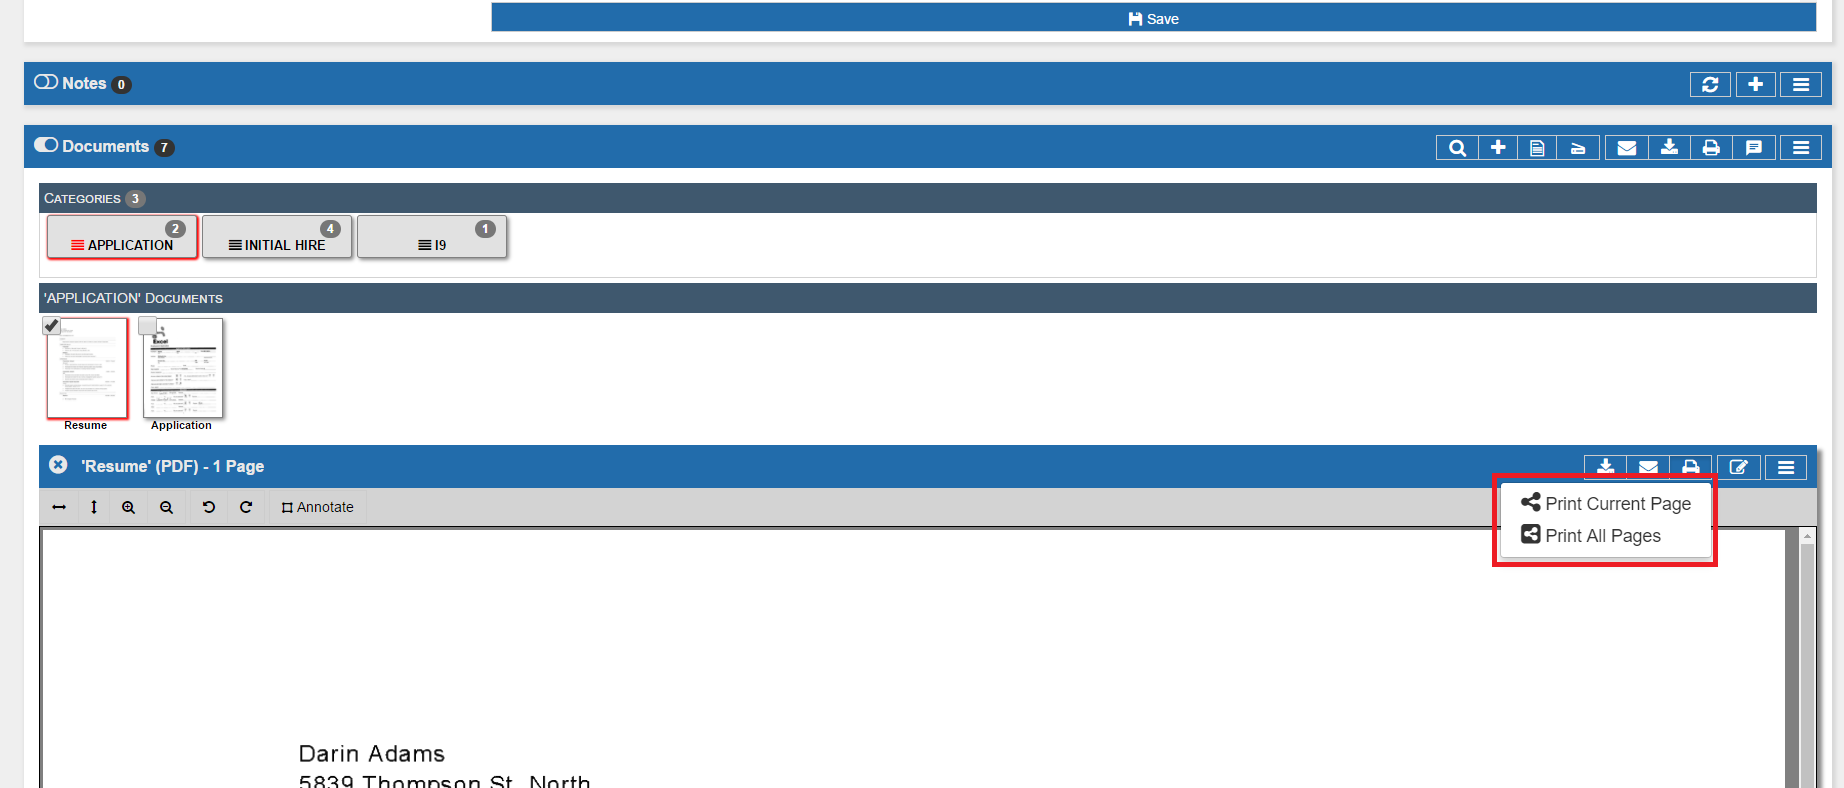
Upon clicking the “Print” button, you will need to select which pages you’d like to Print. One import thing to note is that what you are doing at this time is adding pages to a print list called the print queue. Once you add all the desired pages to the print queue you can then print them all at one time.
If you wish to print only the current Page of the Document select the “Print Current Page” button. If you’d rather print all Pages of the Document, select the “Print All Pages” option. Continue to add more pages from this document as needed. You can even add pages from other documents to the print queue until you are ready.
Printing

Once you have the print queue ready with all the desired documents you can then print. When “printing” documents you are really creating a PDF file that will contain all the pages to print. That PDF will be downloaded to your computer where you can print it from your native PDF viewer.
You will notice 4 icons on the print queue header bar – 1 on the left and 3 on the right. On the left is Bates and the right is Cancel, Email and Download.
- Bates – This allows you to specify Bates stamping options for the output of the pages (more info below). This is a toggle that can be clicked on or off.
- Cancel – this will clear out the print queue so you can start over.
- Email – This will bring up an email screen so you can email the PDF directly from your browser.
- Download – This will download PDF to your computer so you can print it or save it.
If you choose Email or Download then one of two things will happen. If Bates was toggled ON then you will see the Bates Stamping screen. If it was toggle OFF then you will skip this screen.
To print the document, click the Download icon.
Bates Stamping

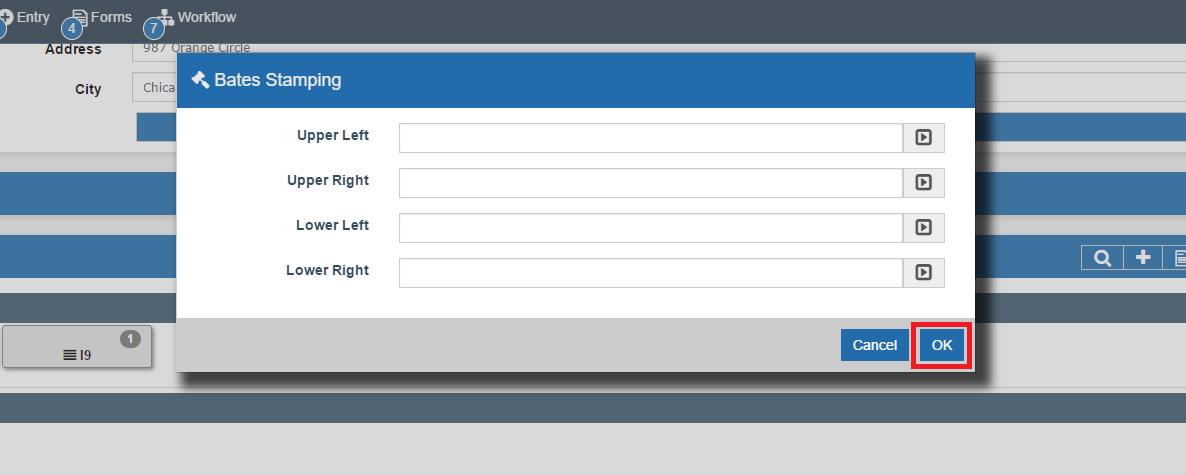
If Bates was toggled ON then a Bates Stamping pop-up will appear before the Document is downloaded.
Bates Stamping is the process of applying text values to the margins of documents as they are output from the system. The Bates Stamping form asks for text that is to be applied to the upper left, upper right, lower left and lower right margins of the document. Not only is static text allowed in these fields but also some variables. Variables are available from the drop-down list on each field.
If no Bates Stamping will be done, simply press the OK button to skip this step.
Downloading
Once the Bates stamping is entered (or skipped) you will be prompted to download the PDF Document. This PDF will contain all the pages from the print queue. You can now print the PDF, email it, save it or anything else you wish to do.
Summary
There you go! You have successfully printed a Document from docMgt. Remember to come back weekly for a new Support Line article.


