
Building a Contact Us Form – Step by Step
Most sites have a Contact Us form where users can ask questions or leave comments about the Web site, products, services and more. The problem with most systems like WordPress or other Web site builders is they only email the contact information and it is quite possible that it will be missed, sent to junk mail or forgotten once it is read. To be truly responsive to your customers’ needs you should route your Contact Us information through a workflow system like docMgt to provide alerts, reminders and follow up actions.
In this article we will show you how to build a Contact Us form that can be used from your Web site. The information will be stored in docMgt for use in workflow, retrieval and follow up. In a coming article we will walk through setting up a simple workflow through which this Contact Us information will flow.
Creating a Record Type
In order to have the information properly accessible and displayed in the docMgt system you should first set up a Record Type. This allows you to better control the information such as who has access to it and how it will be routed.
Step 1: Start New Record Type
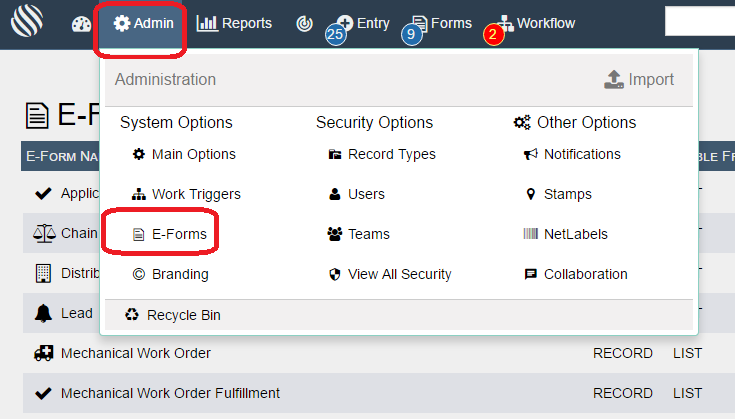
Click the Admin button in the top toolbar then select Record Types in the drop down screen. This will take you to the list of Record Types already in your system. Click the ADD button to add a new Record Type.

Step 2: Set the Record Type Name and Fields
In the General Settings section set the Name to “Contact Us”. For the fields we will use the following configuration:
- RecordType, Type = Hidden, Default Value = ContactUs, Filter = ContactUs (see screen shot)
- Name – Type = Text
- Email – Type = Text
- Contents – Type = Text
- Date – Type = Date

RecordType Field

All Fields
Make sure to save your Record Type and then continue to the next section.
Creating The Form
Step 1: Start a Blank E-Form
Click the Admin button in the top toolbar then select E-Forms in the drop down screen. This will take you to the list of E-Forms already in your system.
Click the ADD button to start a new E-Form.

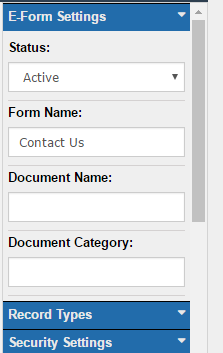
Before you proceed, you should give the form a name. On the right side of the screen you should see a Form Name field in the E-Form Settings box. Change the name to “Contact Us”.
Step 2: Update The Banner
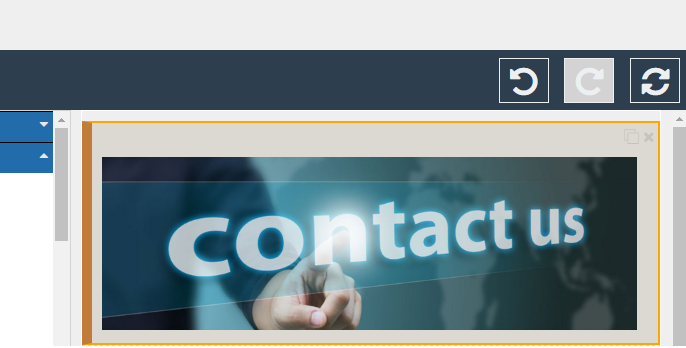
The next thing you will want to do is to change the default heading of the form to show your banner. We will stick with the typical horizontal bar graphic but feel free to use anything you want. In this example we will be using a generic “Contact Us” graphic.
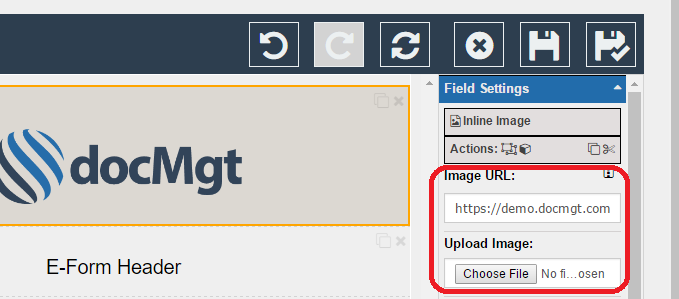
To change the top image, click on the image to show the properties on the right. Look for the Image URL property. Put the full URL to your banner image in this field to show your image. You can upload the image using the upload button but please read the Efficiency Tip!
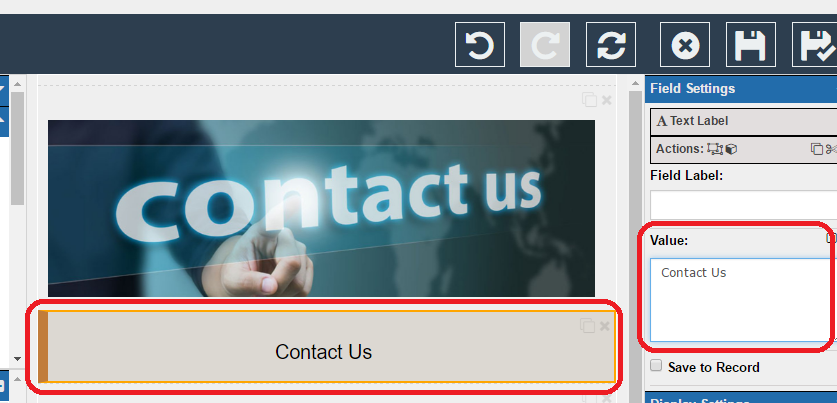
Step 3: Set The Title
Next you will want to set your own title. Typically we would go with “Contact Us” or “ACME Contact Form” or something similar. For this example we will use “Contact Us.”
Click on the field that has “E-Form Header” as its text. Then on the right you can change the value to the word “Contact Us” or whatever you want. This will update the field on the form.
Feel free to set the font size, color and more in the Display Settings box in the right panel. This will affect how the header text looks. You can change the font size, font family, color alignment and more.
Step 4: Add The Fields
Now that the simple work is done, let’s get to the meat of the form – the fields. For this example we will add one field to the form for each field we defined in the Record Type earlier in the example.
Expand the Record Types section in the left side of the form. Then find the Contact Us Record Type and expand that to show all the fields we defined earlier. For each field, drag and drop it from the list onto the form in as described below.
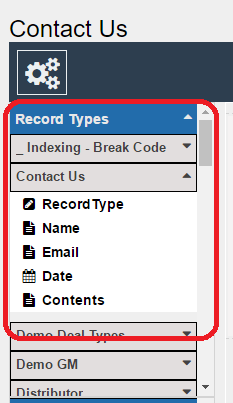
- Drop the RecordType field just under the header line in the form.
- Drop the Name field next then make the following changes in the properties on the right:
- Change the “Field Label” to “Your Name”
- Turn on the “Required” setting
- Drop the Email field then make the following changes in the properties on the right:
- Change the “Field Label” to “Your Email Address”
- Turn on the “Required” setting
- Under the “Advanced Settings” section, use the “Convert Field To:” option to convert this to an Email field. This will enforce email formatting rules on the text entered.
- Drop the Date field then make the following changes in the properties on the right:
- Under the “Advanced Settings” section, use the “Convert Field To:” option to convert this to a Hidden field. This will make sure the date is not changed by the end user.
- In the “Default Value” field enter “[DATE]” (no quotes) to have the form automatically fill in the current date.
- Drop the Contents field then make the following changes in the properties on the right:
- Change the Field Label to “Comments or Questions”
- Under the “Advanced Settings” section, use the “Convert Field To:” option to convert this to a Text Area field. This will give the end user more than one line of text to fill in for comments.
- Under the “Display Settings” section, change the “# Rows” setting to 10 to give the user 10 visible lines in the form.
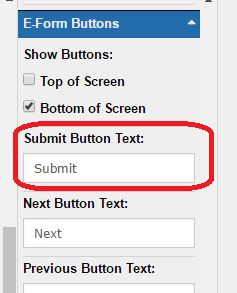
Step 5: Set Up The Buttons
The next thing you will want to do is to set your button properties. By default you have a Save button on the form. This may not be the best text to use so let’s change it. Click on the “Set E-Form Properties” button on the top left then expand the “E-Form Buttons” section on the right. Find the “Save Button Text” property and change it to Submit or Send or something that makes sense for you. We will use Submit.
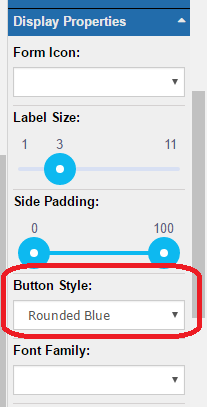
While we are here, expand the “Display Properties” section and select the button style you want. Let’s go with “Rounded Blue” to give it a bit of a fresh look.
Step 6: Set the Save/Cancel Events and the Public property
Now the form is just about complete. At this time we can load the form and see our fields but when we submit the form it takes us to a Record inside of docMgt. We do not want your external users trying to get into docMgt but instead want to take them back to the main web site.
Click on the “Set E-Form Properties” button on the top left then expand the “Save / Cancel Events” property section on the right. There are 4 settings here but we are only worried about the “Public Save URL” option. We need to put a URL into this field. This is the web address that the end user will be sent to once they submit the Contact Us form. You can take them to a static Thank You page on your site or even just to your home page. We will use https://docmgt.com for this example.

If you test the form as a logged in user you will be taken to the Record where the contact us for is stored. This is because we did not enter anything into the “After Save URL” – just the “Public Save URL”. If you log out and test the form as a public user, you will be taken to the URL you entered in the “Public Save URL” field.
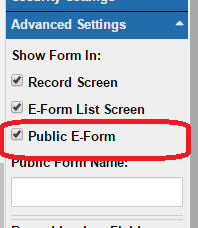
In order to have this form available as a Public form you need to turn on one more setting. Under the “Advanced Settings” section check ON the “Public E-Form” option. Without this the outside users will not be able to get to the form.
Step 7: Link to the Form
Now that the form has been created you just need to link to it from your Web site. If you have a Contact Us button or menu option then you need to set the link from that option to go to the URL for this form. In order to see what that URL is you simply need to open a new E-Form of this type and copy the URL from your browser.
From the top toolbar, click on the Forms option. Find your form in the list and click on it. When the browser loads your form you will see the URL to the form in the address bar. It will look something like: https://yoursite.docmgt.com/eforms/form/123. Take that URL and use it in your Web site.
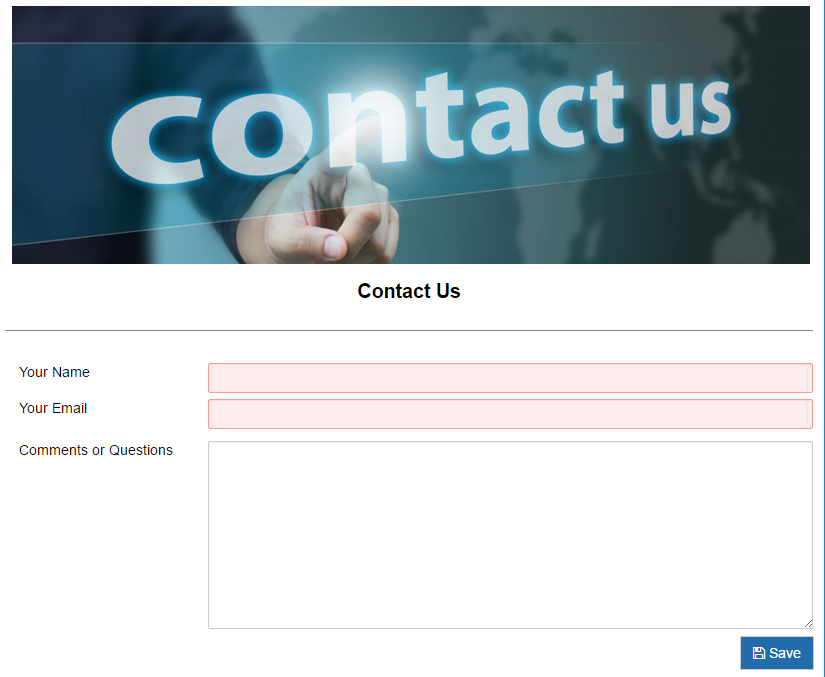
When you are done your form should look something like this:
Summary
There you have it – a working Contact Us form for your Web site. Most of the decisions we made in this tutorial were that of design preference. We walked through a very simplistic example but you may want to extend this example to fulfill your needs. Maybe you want to change the background colors, maybe change the button look, maybe change more text colors. You will probably want to match your Web site design as much as possible.
The next part of this tutorial, Step-By-Step: Contact Us Workflow, goes into the workflow aspects of the Contact Us process.