
docMgt now offers support for Multi-Value Fields which allow you to add multiple Fields with the same name to a Record. This blog will review the appropriate steps in adding Fields with the same name within a Record.
While creating a new Record Type select the Fields panel [icon name=”plus-square-o” class=”” unprefixed_class=””] icon to add a new Multi-Value Field. If you wish to make an existing Field a Multi-Value Field, simply select the appropriate existing Field.
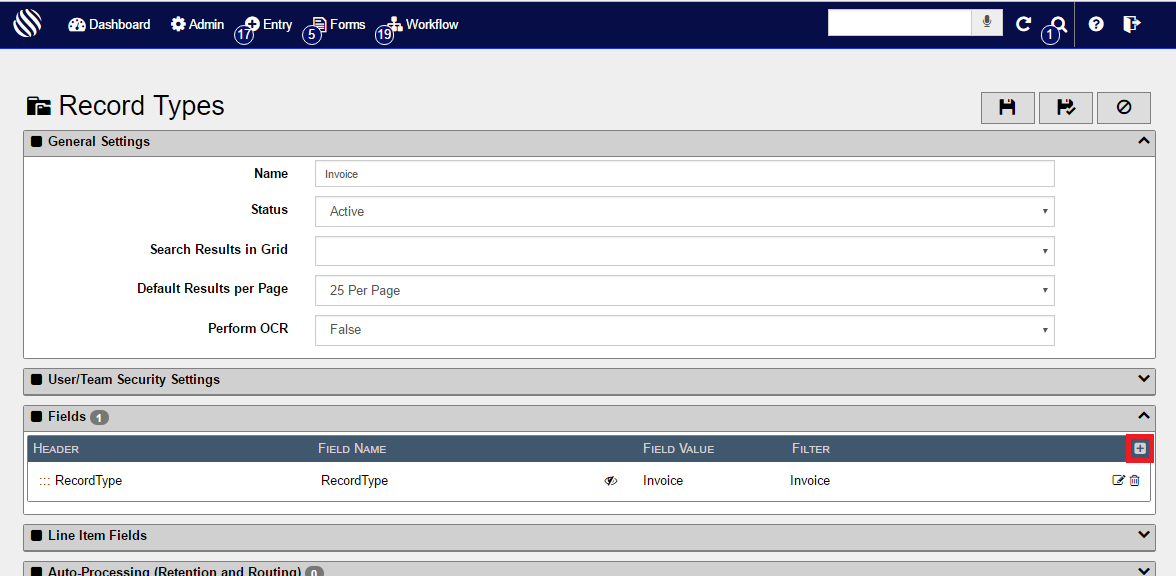
Once you either Add a new Field or edit an Existing Field you have several options. One of those options is to Allow more than one value for the same field name.
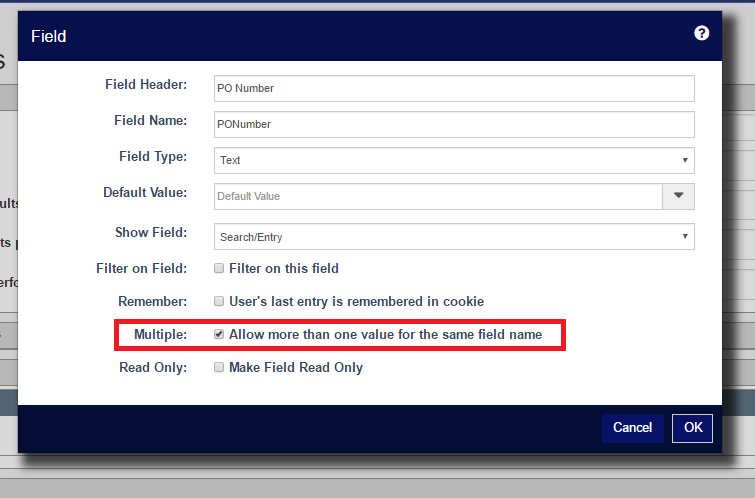
By selecting this checkbox, you are allowing the possibility of multiple values being submitted under one field name. In the example above you’ll see that the user is allowing more than one Purchase Order Number to be submitted within one PO Number Field.
Now that you have allowed this option, you will be able to see it in action throughout several pages in docMgt:
Entry
From the toolbar you have the option to enter a Record Entry screen. Once you hover over the Entry option, a list of created Record Types will appear.
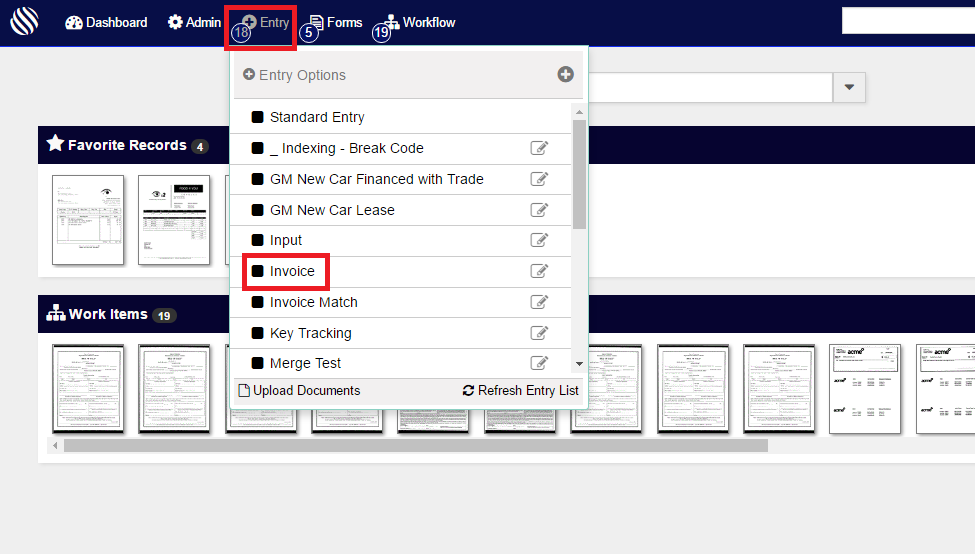
After you select the desired Record Type a record Entry screen will appear. Here you’ll have the option the create a Record by entering Field values.
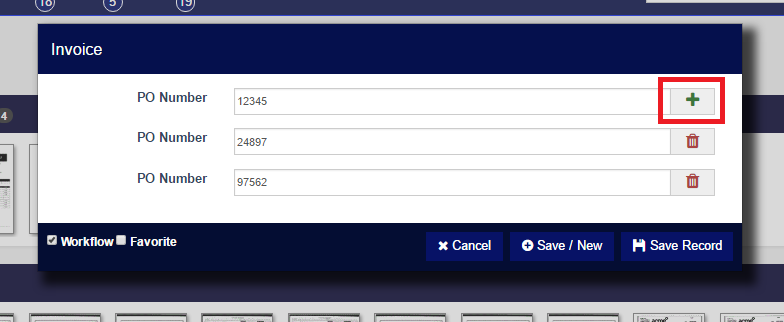
Now, you’ll be able to add multiple values for a Field, in the above example, multiple PO Numbers. Simply press the [icon name=”plus” class=”” unprefixed_class=””] icon in order to add more than one value to the same Field name. If you wish to delete one of the field values select the [icon name=”trash” class=”” unprefixed_class=””] button next to the appropriate field.
Once the record Entry is saved, you will be sent to the new record’s Record Screen.
Record Screen
Within a Record Screen you will have the option to yet again add multiple values to a single Field name.
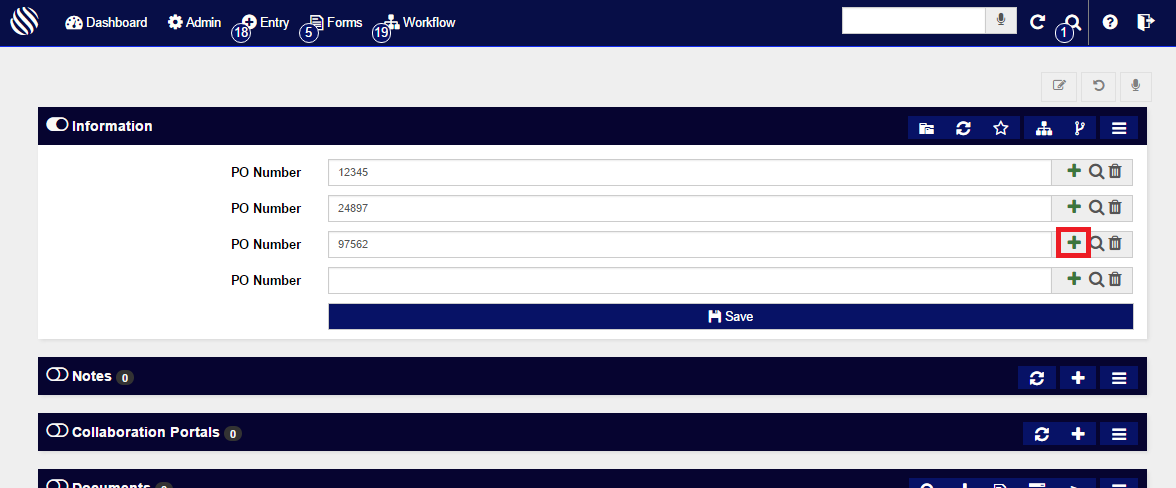
Press the [icon name=”plus” class=”” unprefixed_class=””] icon to add another value. Delete any unwanted value by simply pressing the [icon name=”trash” class=”” unprefixed_class=””] button. Remember to press the [icon name=”floppy-o” class=”” unprefixed_class=””] Save button when you’ve completed your work!
Note: This will not be an option for fields that have not been given permissions to do so from the Record Type screen.
Indexing
Finally, Multi-Value fields are seen in the Indexing workflow step. If you are within the Record Type that has a field that was given permissions to “Allow more than one value for the same field name” you will have the option to add more than one of these values in the Indexing step.
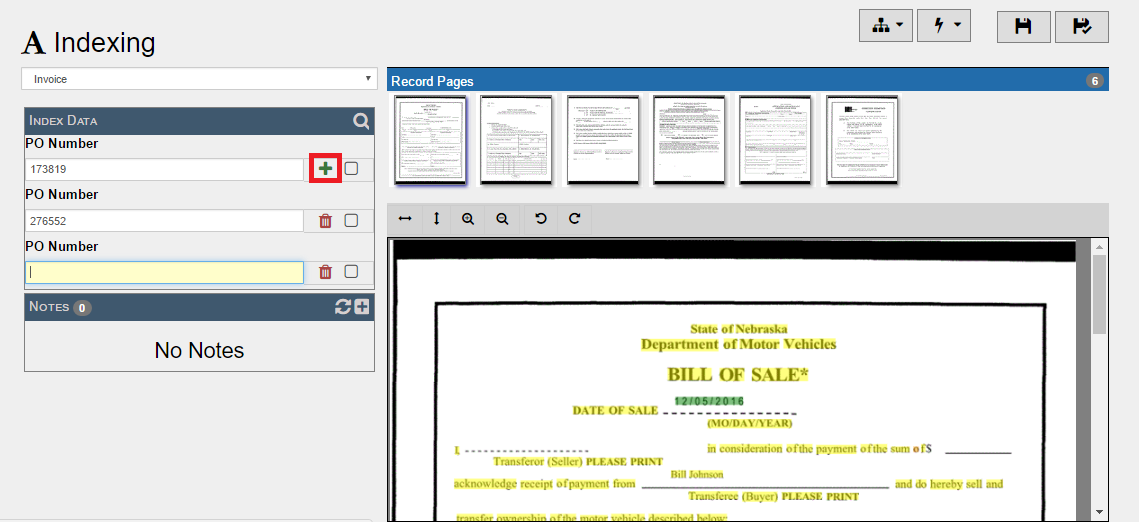
While indexing the imported piece, all Index Fields will be shown in the left panel. Those Fields that have been given the rights to have more than one value will once again have the [icon name=”plus” class=”” unprefixed_class=””] icon. Simply, click on the [icon name=”plus” class=”” unprefixed_class=””] icon to add another value.
Delete any unwanted value by simply pressing the [icon name=”trash” class=”” unprefixed_class=””] button.
Summary
Now you know how to add multiple values for the same Field name! Hopefully, after reading this blog post you’ve seen the benefits behind this great feature!