
How To Configure Auto-Classify
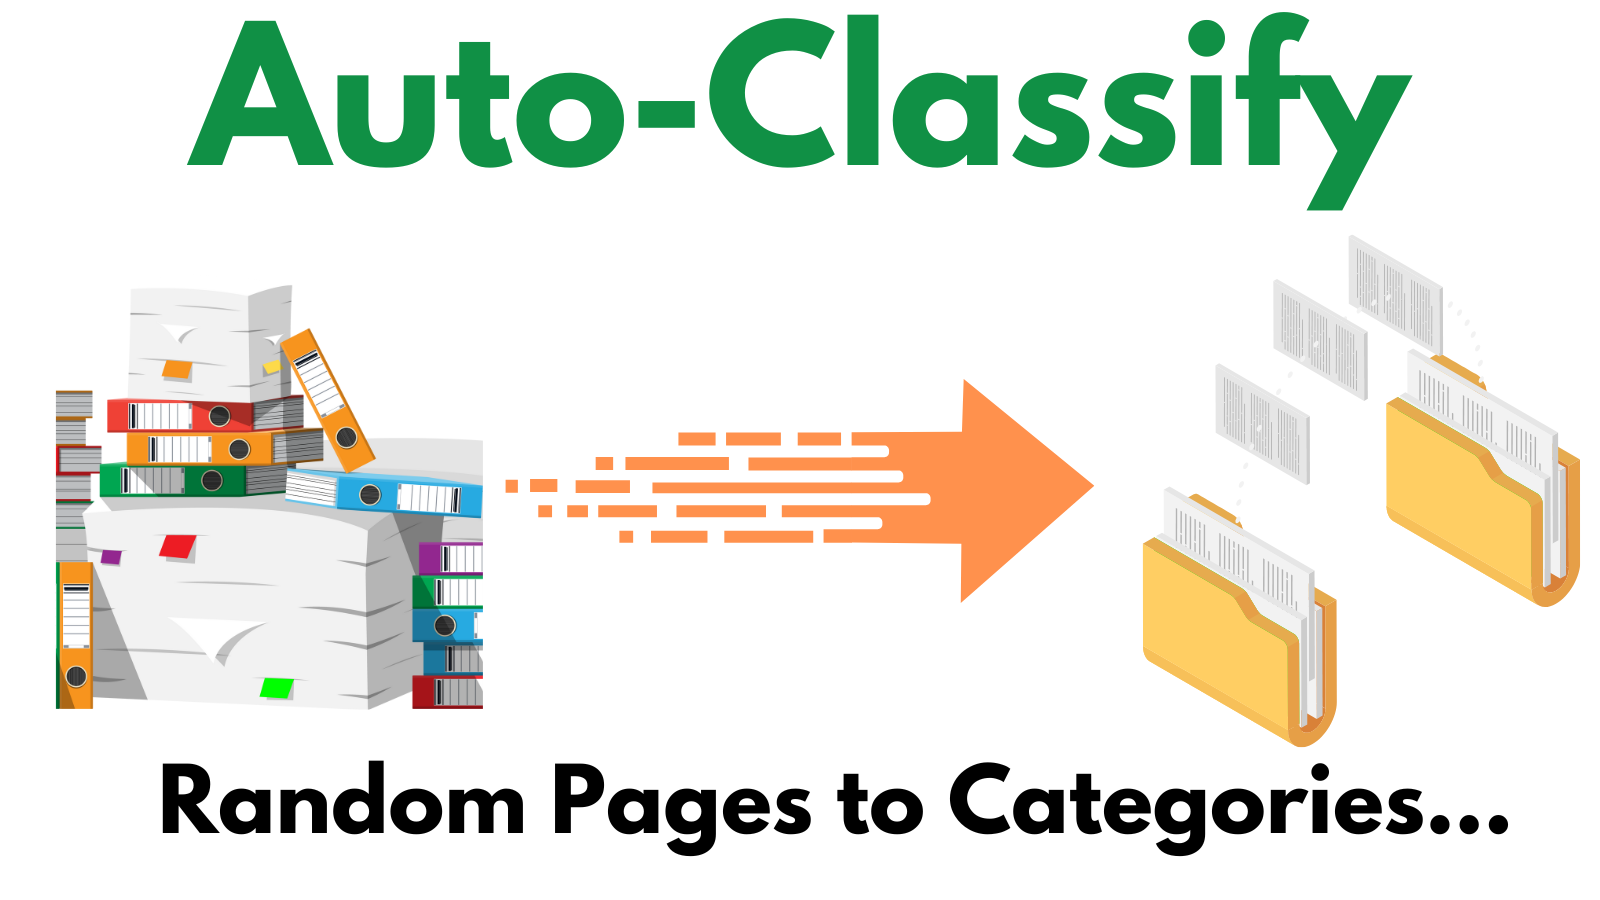
This article will walk you through how to configure Auto-Classify. The Auto-Classify feature allows you to split documents and move the pages into their respective categories and subcategories. This is done by using the OCR data to look for words and phrases in the pages. Once a word/phrase is found, the document is split on that page. All the splits are then moved to the defined Categories/Sub-Categories.
Prerequisites
In order to get the most out of this article, you should be familiar with DocMgt workflow and document categories. You also must already have a Record Type that can hold the documents to be classified. We will be using Workflow and OCR so your DocMgt license must include those features as well.
In order to specify the most details about an Auto-Classify action, you will need to have the Enterprise license. While it is possible to auto-classify using the Record Type Categories, it is very limited compared to the Enterprise license. All examples used are based on the Enterprise license.
Step 1 – Create or Use an Existing a Process
Make sure you have a workflow process for this walk through. If you have one, you can add these steps to that process. If you do not have one, create one for your Record Type.
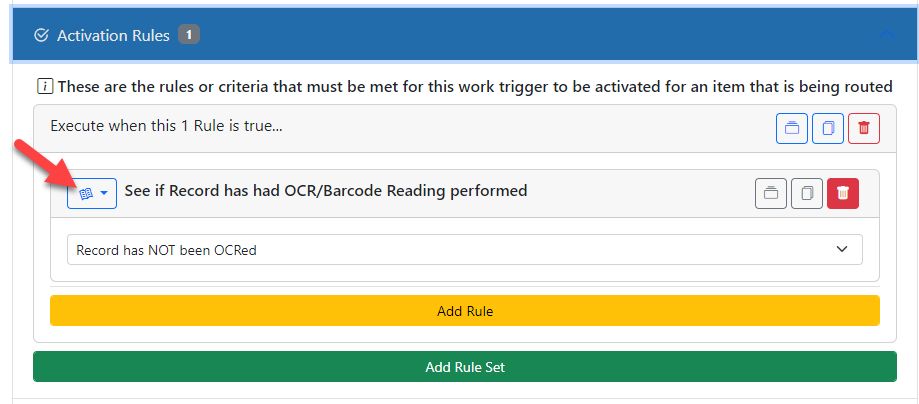
Step 2 – Add OCR Trigger
Once You need to be able to read the text on the pages to perform the proper classification. This is done using the OCR action in workflow. Add a Work Trigger to your process that performs OCR. There is nothing special about this trigger other than it is to be used to execute the OCR action.
It is best to activate the Work Trigger using the OCR Status rule. Set it to activate if the Record has not been OCR’d.
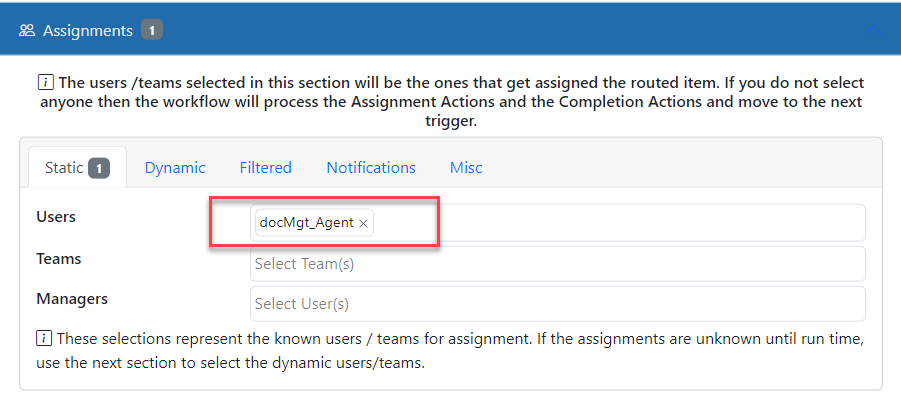
Also, remember that for OCR to work, you need to have the system wait until OCR is complete before it continues down workflow. To do this, assign the trigger to the docMgt_Agent user. When the OCR has been performed, the OCR engine will automatically complete the Work Trigger for you so the process can continue.
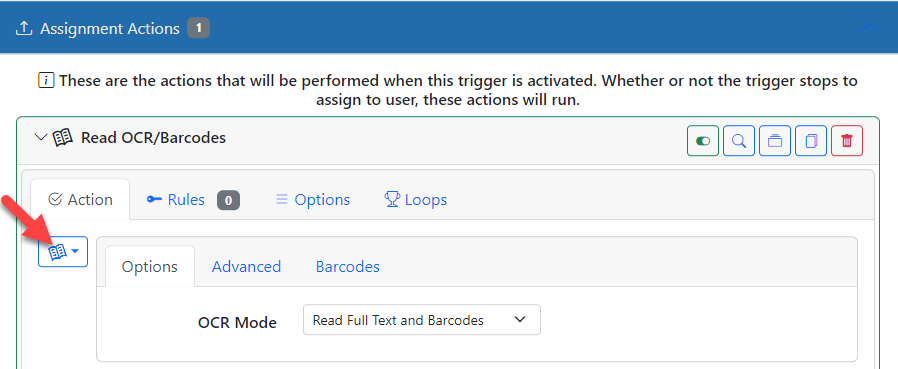
Now the trigger just needs to know what action to take. In the Assignment Actions section, add an OCR action. You can normally just use the default settings for this.
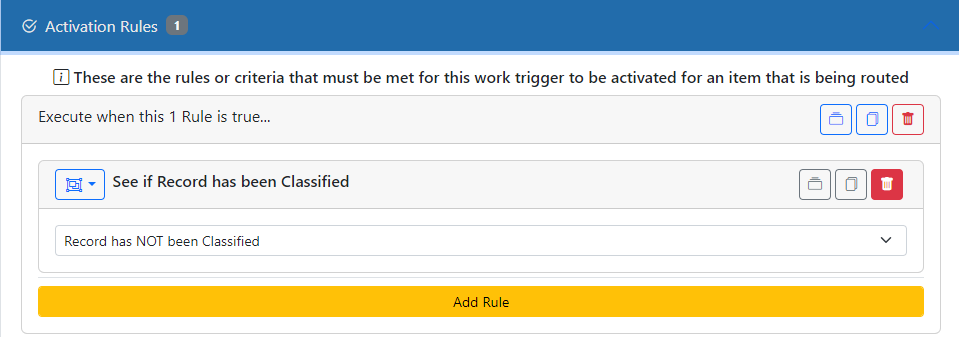
Step 3 – Add Auto-Classify Trigger
Now that the OCR is in place, you can add in the logic to do all the classifications. Add another trigger for the classify actions. Here we will put all the logic that is required to split the documents and set their Categories and Subcategories.
It is best to activate this Work Trigger using the Classify Status rule. Set it to activate if the Record has not been Classified.
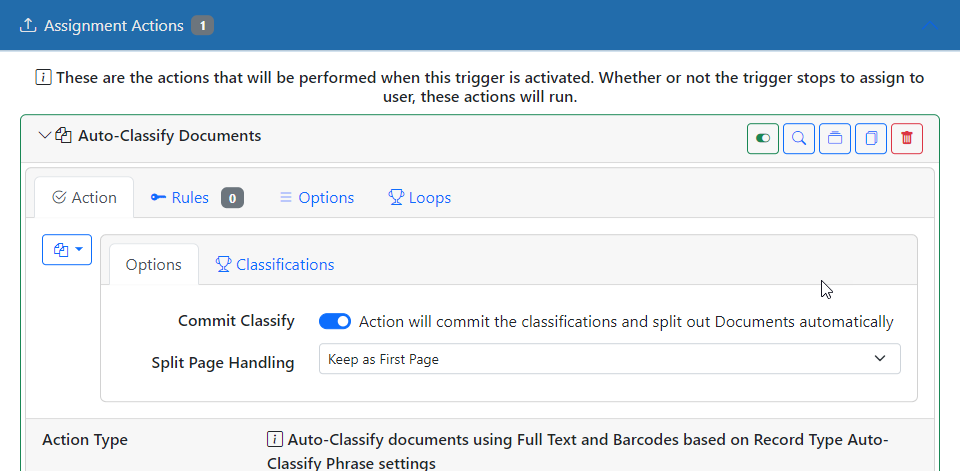
Now for the meat of the process – the Auto-Classify action. Add an Assignment Action of the “Auto-Classify Documents” type. In this example we will assume that the text we find is on the first page of the document for that classification. So, make sure to keep the “Split Page Handling” to “Keep as First Page.” If we had disposable break sheets (i.e. barcode sheets) we might change this to “Discard” but for this example, keep as first.
Step 4 – Classifications
The heart of how to configure auto-classify is really in the Classifications panel. Here you add one classification per Category and/or Subcategory. For each, you must specify the words to find on a page in order to classify it. Any page that does not match a classification will go to the last matched classification. This way, multipage documents will be able to stay together.
Example Document
In this example, we will be splitting an employee hiring packet. Toward the top of each page there will be a title such as “Employment Application” shown in the example below. We will use those titles to tell the system how to split the document.

Configuring the Classifications
We will use the “Classifications” tab and add one entry for each classification (i.e., each document split). This example will look for “Employment Application” at the top of the page and will move that to the “Application” category and name the document “Application.”

- Break To – This is where you tell the system to place the matching documents. In this example, if a document matches the classification, it will be moved into the “Application” category and name the document “Application” as well. You could also specify a subcategory if you wanted.
- Break Codes – This is where you configure what words to search for. You can specify Text and Barcode, Text Only, or Barcode Only. You can also tell it what words will negate the split. In other words, if the “Negation Codes” words are found then DO NOT split here.
- Full Text / Barcode – Use this to find the text in either the OCR or the barcode data. This is the simplest way to configure the classifications. If you need to specify to only use text or barcodes thn use the next areas.
- Full Text Only – If you need to be sure to NOT use barcodes for splitting, enter the split words here.
- Barcode Only – If you need to be sure to NOT use full text for splitting, enter the split words here.
- Negation Codes – In rare cases, you may need to have a way to NOT split even though the text you want to match on is found in the page. The use case for this is if the text you need to split on may show up in other documents. For example, if you are classifying a contract, the contract may have a Signature Page section that you want classified. You could just use “Signature Page” in the classification settings, but what if the contract has another section that states something like “this contract is only valid if all information is on the signature page and is also initialed” or something like that. You don’t want that section’s “signature page” text to split the page to the Signature Page category. This is where the “Negation Codes” come in. Add “this contract is only valid” into the negation code area, and this will prevent the classification from happening.
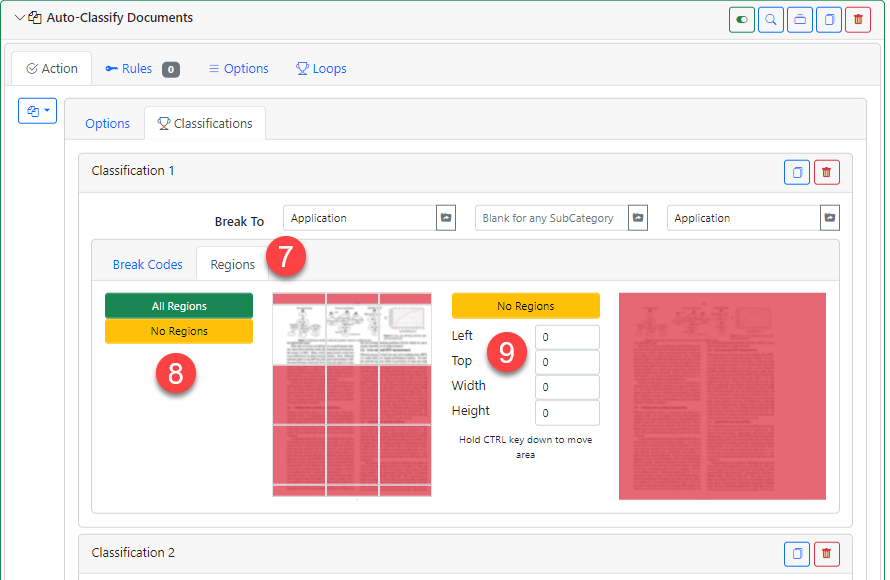
- Regions – The Regions tell the system where on the page(s) to look for the matching text. You have 2 zone settings, and they both work together.
- Pre-Defined Regions – You can use the pre-defined regions to quickly select an area on the page to look. The RED areas are where NOT to look and the WHITE areas are where to look. However, if ALL areas for pre-defined and custom areas are RED then the entire page will be used.
- Custom Region – You can select a specific region of the page(s) to look for the data. This is useful if the document in question always has the value you need in the same location and you want to be very specific about where to find it. The RED area is where NOT to look, and the WHITE area is where to look. However, if ALL areas for pre-defined and custom areas are RED then the entire page will be used.
Configuring the Regions
In this example, we are looking toward the top of the page for the phrase “Employment Application.” Once the text is found that page will be assigned to the “Application” category and named “Application.”
Notes
Things to keep in mind:
- Any page that does not match a classification will be added to the previous classification that was found.
- All pages assigned to the same Category, Subcategory and Name will be combined into a single document.
- If the first page(s) do not match then they will stay classified using the same Category, Subcategory and Name as they started.
- You can use REGEX in your break words by specifying “REGEX:<regex pattern>” in the break codes areas.
- You can have multiple break words/phrases that will cause a classification split by entering one per line in the break codes areas.
Summary
Configuring the Auto-Classify system is detail oriented. You need to specify, for each document type, how to break and not break based on the text found on the pages. It may seem daunting, but once you do it a couple times it will become much easier.
Related Articles