

Designing E-Forms
Electronic Forms (E-Forms) allow users to interact with docMgt in ways other than standard screens. With E-Forms users can view and enter data, view documents and even interact with outside users by allowing public access to specific E-Forms automatically. Designing E-Forms is a fairly simple task in most cases but there are a lot of options and extras that are available for advanced E-Forms as well.
Each E-Form is designed by using a simple drag and drop interface that makes e-form building simple yet powerful enough to work for most any situation. The E-Form is created once then used many times for data entry. As the form is filled out by the end user the E-Form is saved into a record (new or existing) and the form is saved as a document in that record. The data entered into the form is automatically used for searches in the system to make finding E-Form information fast and easy.
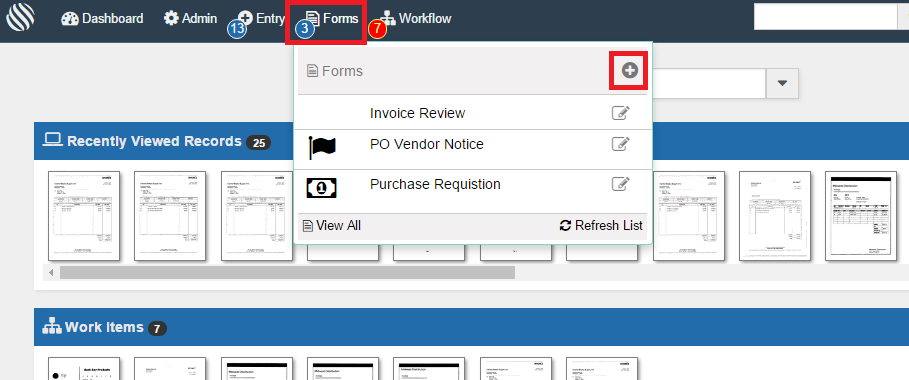
To create a new E-Form, select the [icon name=”plus-circle” class=”” unprefixed_class=””] icon from the Forms section in the toolbar.
The E-Form Designer is where you add new or edit existing E-Forms. The basic design process is fairly straight forward:
- Set the form properties
- Drop the fields into the form
- Set field properties
- Save Form
There are a lot of options available but that is the basic process.
Set Form Properties
There are several properties that are set at the E-Form level. The settings dialog is visible when the form is first loaded. If you ever want to get back to the E-From Settings panel, click the “E-Form Settings” button on the top left section of the tool bar.
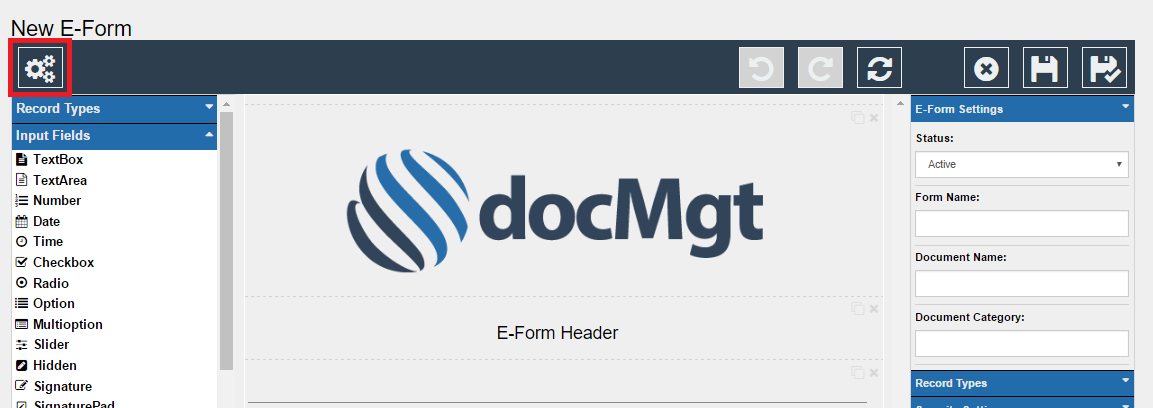
The E-Form Settings panel will appear on the right side of the E-Form Designer page. This panel is where you set the E-Form properties. It is broken out into several categorized sections for easy access to settings and properties.
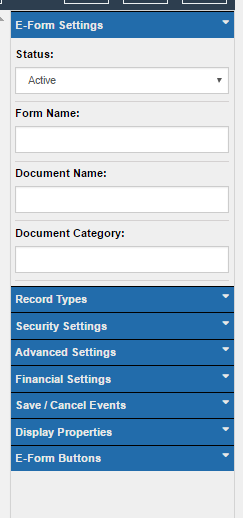
The sections you have available are:
- E-Form Settings – This includes settings such as the Status, Name (which is required) and more
- Record Types – allows you to specify which Record Type this form is meant to be used with. If you do not select any Record Type then it is assumed you wish to use the form with all Record Types based off of permission rights.
- Security Settings – allows forms to be password protected
- Advanced Settings – allows you to determine how and from where the form will be available. Record Lookup Fields are also set here. Finally, Save Actions are available, which determines what occurs to the E-Form once saved.
- Financial Settings – these settings affect the financial options of the entire form.
- Save / Cancel Events – these settings control where the user is directed after they Save or Cancel the form.
- Display Properties – customize the Form’s look and feel with these settings.
- E-Form Buttons – the appearance of E-Form buttons can be controlled from this section.
Drag and Drop Fields
There are several field options to drag and drop onto your form. Some of these include:

Record Type Fields:
- All fields from the defined Record Types are available to drag and drop onto the form. This not only adds the field to the form but also sets the proper “Save to Record” flags and the proper field type.
Input Fields:
- Text Boxes
- Option Lists
- Date Fields
- File Upload
- Signature Pad
- Credit Card
- more
Display Fields:
- Images
- YouTube Video
- Text Label
- more
Components:
- Phone
- States
- more
Containers:
- 2-5 Columns
- Flex Columns
Tables:
- Basic Table
- Invoice Table
- Timesheet Table
Dynamic Fields:
- User
- Team
- Custom Options
Quiz Fields:
- Quiz Question
- Quiz Anser
- Pain Face
- Pain Scale
Custom Fields
- Created by an admin user to re-use in multiple forms.
Set Field Properties
Once you have successfully dropped a field onto a form, you’ll need to give the field its specific properties. Some of these Field Properties include:
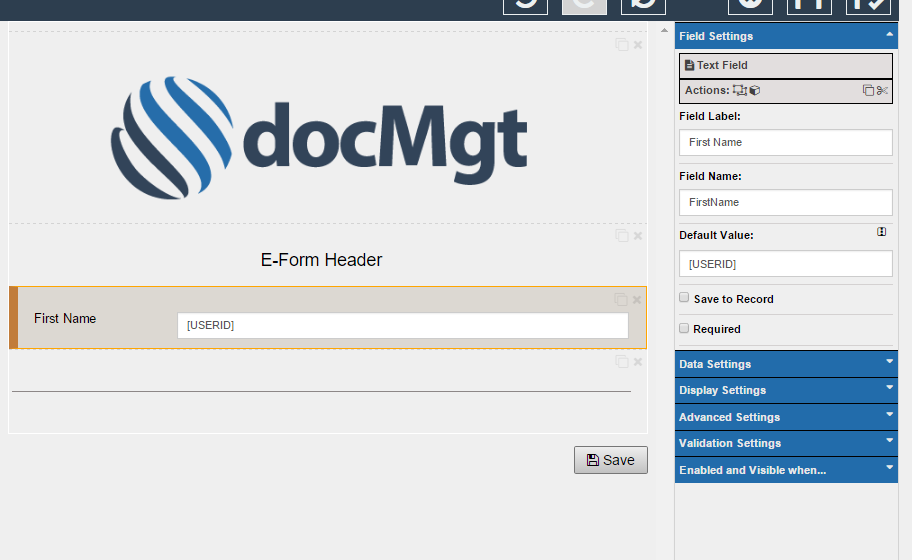
Field Settings:
- Field Label
- Field Name
- more
Data Settings:
- Get Value From – Allows a field to use data from another field
- more
Advanced Settings:
- Convert Field To – convert the field to a different field type
Validation Settings:
- Entry Verification
- Invalid Entry Text
Enabled and Visible when…:
- Enabled/Disabled When – determines when field is enable or disabled
- Visible/Hidden When – determines when field is visible or hidden
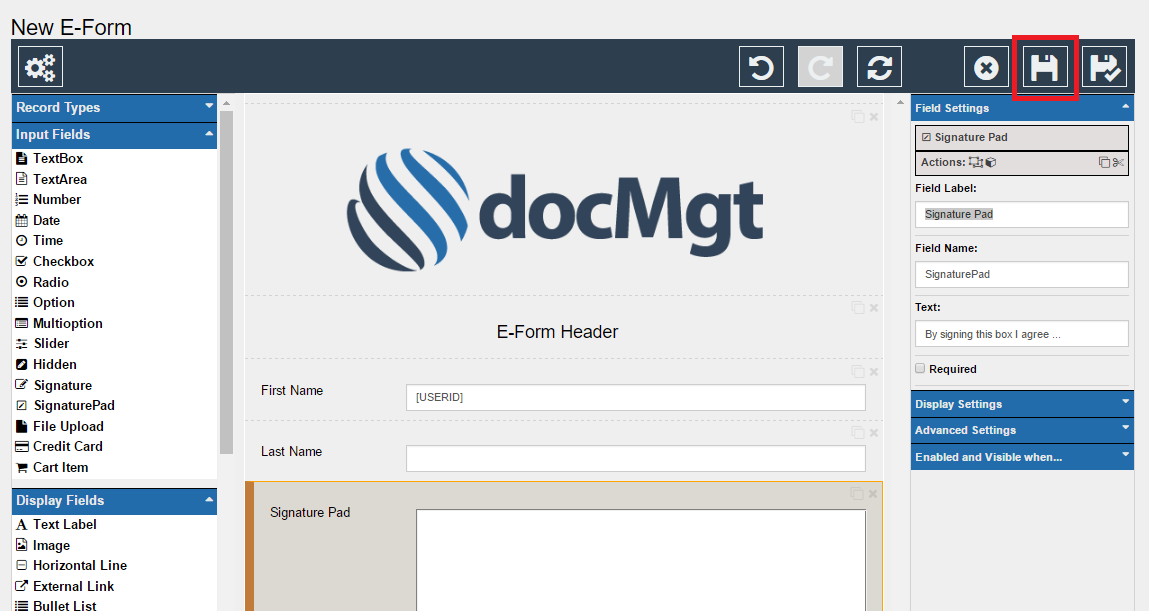
Before exiting the E-Form Designer, make sure to properly Save the form.
Summary:
docMgt’s E-Form Designer gives Users and opportunity to full create an optimized electronic form in a very simple manner. We hope you enjoy this great feature!