

Configuring QuickBooks Online Integration
Configuring QuickBooks Online integration is fairly straight forward if you use the Config Manager config as your starting point. In this article we will walk you through setting up the DocMgt integration to QuickBooks Online (QBO).
Import Basic Configuration from Config Manager
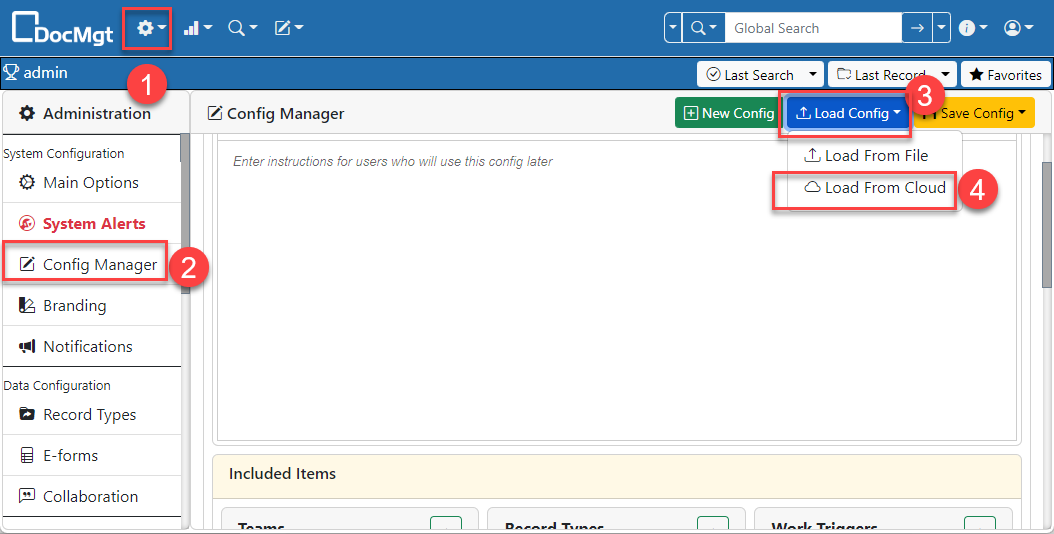
The first thing to do is to use the Config Manager to load the QBO configuration into the system. Go to Admin, Config Manager. Click the “Load Config” button and select “Load from Cloud”. This will bring up a list of configs you can load.
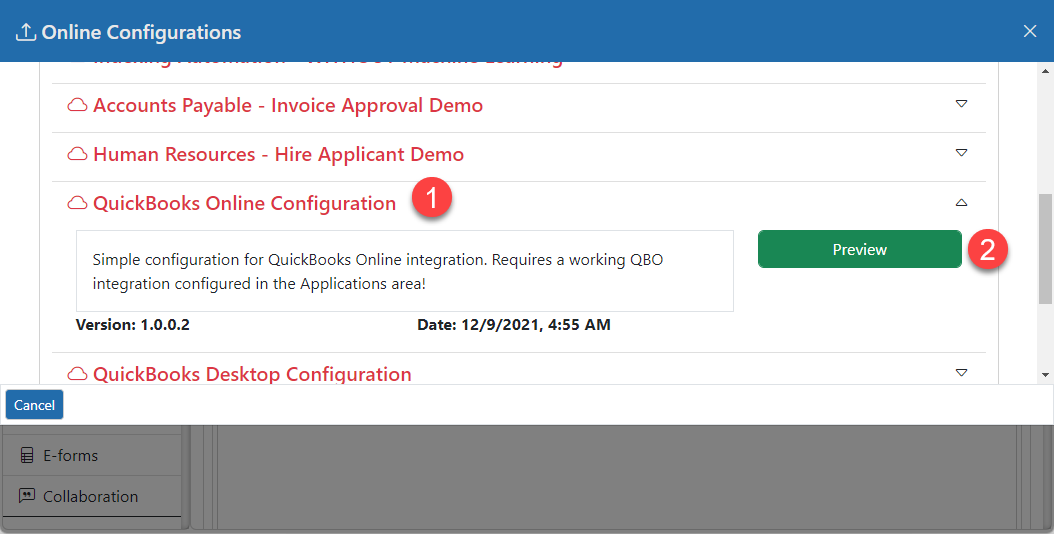
From the list, select “QuickBooks Online Configuration” then click the “Preview” button.
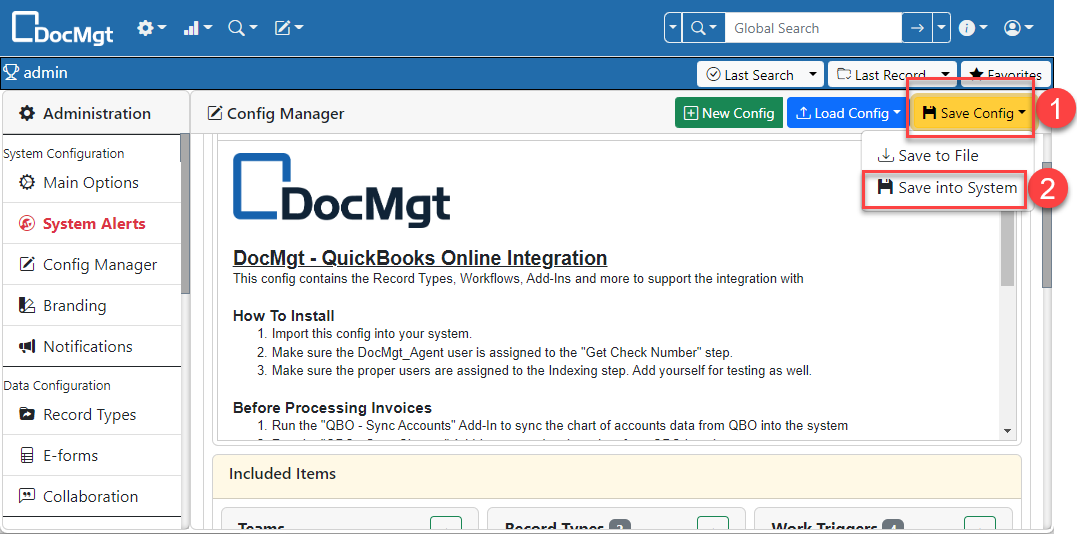
This will load the config into the Config Manager window for you to review. If you are OK with the config then click the “Save Config” button then select “Save into System”. This will bring up the “Config Save Options” panel.
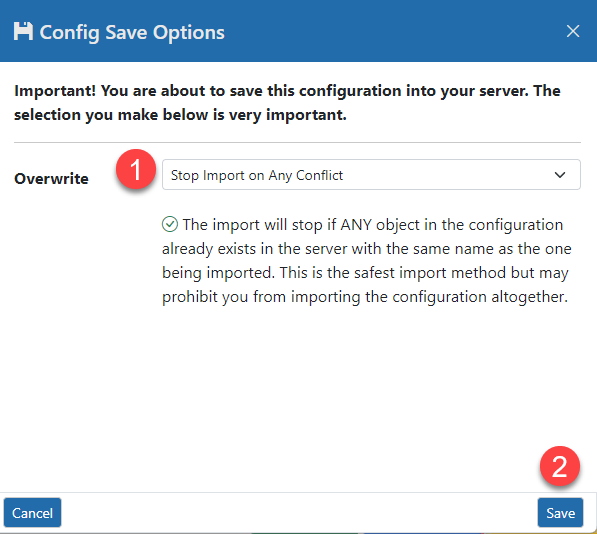
Set the the Overwrite option to “Stop Import on Any Conflict” then click the “Save” button to bring the config into your system. If there are any conflicts, stop here and contact support.
If all went well then make sure you follow all the instructions in the top panel of the Config Manager window in the box labelled “Description / Instructions”.
Authorize DocMgt to Work with QuickBooks Online
The next thing to do is to set up an integration between DocMgt and QuickBooks. For this, you will need to be sure you have someone available who can log into QBO with enough permissions to authorize the integration.
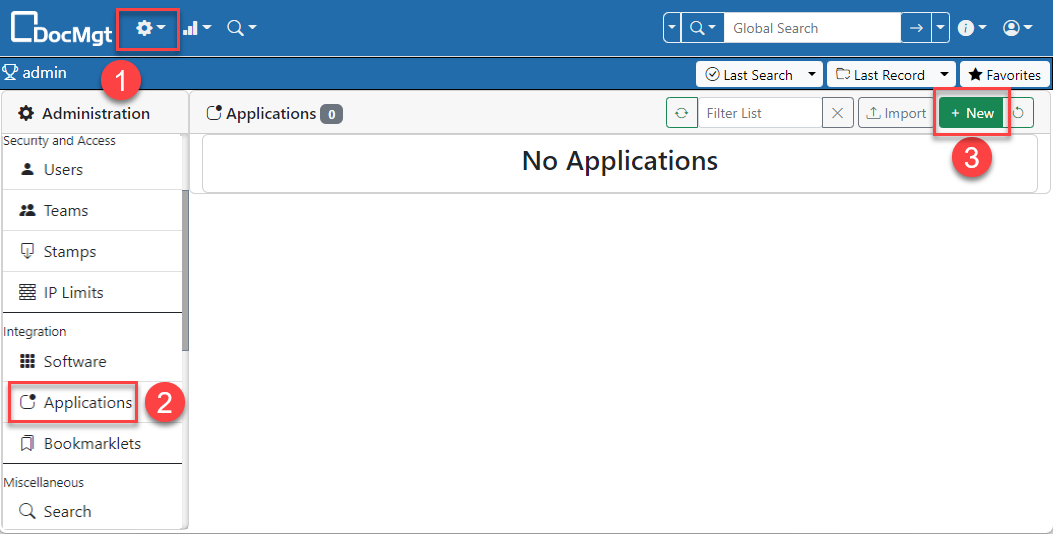
In the “Applications” section of the “Admin” system in DocMgt, click the “New” button to add a new Application. This is what allows QBO and DocMgt to interact.
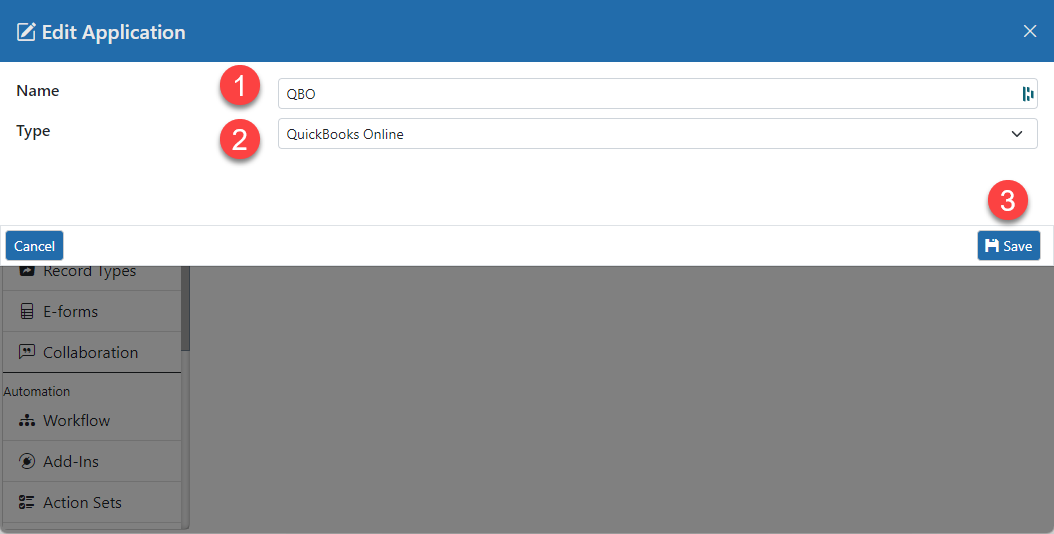
In the “Edit Application” panel, name the application QBO (or anything unique but recognizable). The select “QuickBooks Online” for the Type then click the “Save” button.
After the application saves, you will be brought back to the application list. Click on the new application to go back into the “Edit Application” panel. This time you will see a few new buttons shown.
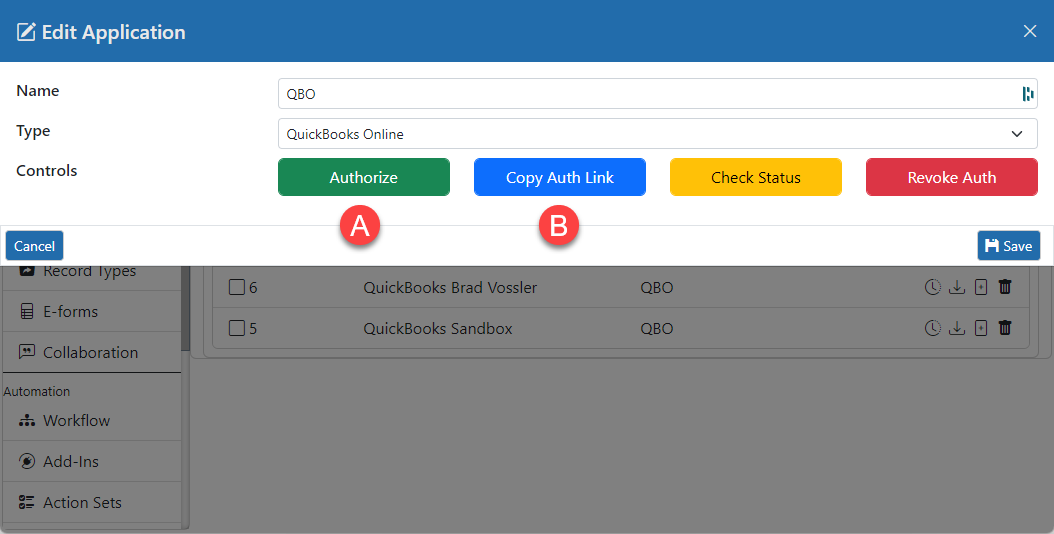
If you are the one who can authenticate QBO or if that person is with you, you can use button A – “Authorize” to start the authorization sequence. If that user is not with you, you can use button B – “Copy Auth Link” to email or chat them a link they can click on to start the authorization sequence.
Once you start the authorization sequence, you will be taken to the login screen for QBO. Log in to QBO as normal and when prompted.
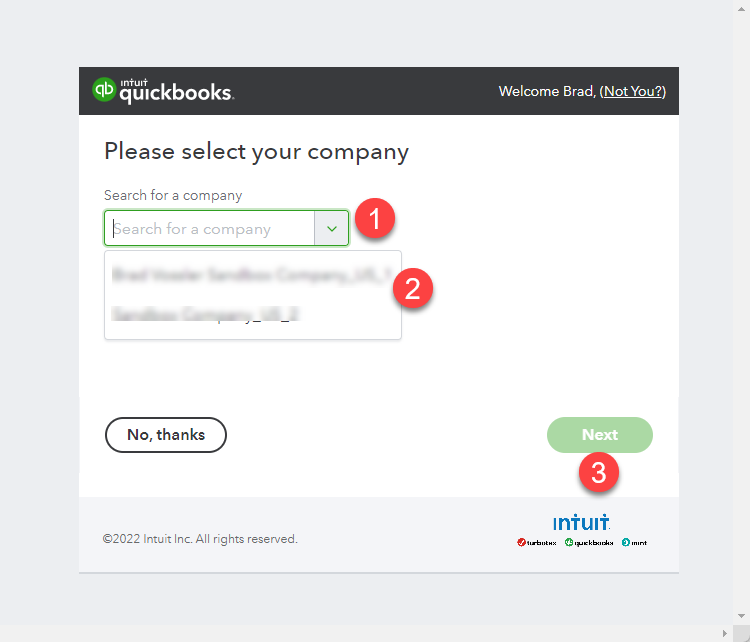
You will be taken to a screen that asks if you are sure you want to authorize the integration. If you have more than one company that you manage, you will be asked which company to authorize. Click the drop down list and select the company to authorize if needed. When selected, click the “Next” button to authorize. You will be taken to a screen that saves the authorization is done and you can close your window.
Integration is Established
At this point the Configuring QuickBooks Online Integration is complete. From here you need to follow the rest of the instructions from the Config Manager’s QBO config screen.