
Add-Ins in docMgt
Add-Ins allow you to extend and enhance the user experience in docMgt. Add-Ins can be created to add custom applications, embedded web pages, perform workflow and multi-step actions to a single button click. They can be added to the tool bar or Record screen and can be shown based on security or environmental variables.
What Is An Add-In?
An Add-In can be used to link to external web pages like Google Maps or Dictionary.com to show related information. They can also be used to pop up a screen from another web application to provide a seamless interface with docMgt. Another practical use is to write a custom Windows application that transfers documents directly another system or imports from that system into docMgt. The possibilities are endless and exciting. In fact, we have done several tests and pilots based on the Add-In architecture. From custom applications written specifically to be housed in docMgt to custom label printing through a NetLabels interface to custom invoice printing routines. There really is no bounds to what can be done.
Creating An Add-In
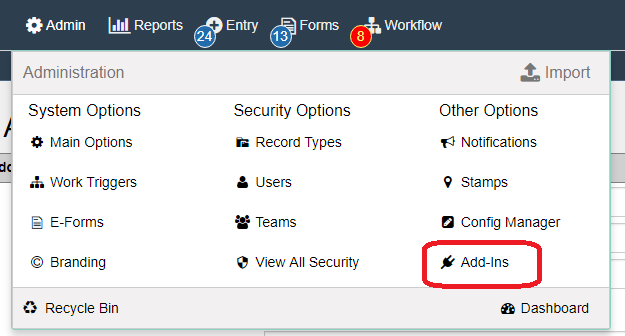
In order to use Add-Ins you must first create the Add-In interface. To access the Add-Ins administrative section go to the Admin drop down on the tool bar and select Add-Ins.
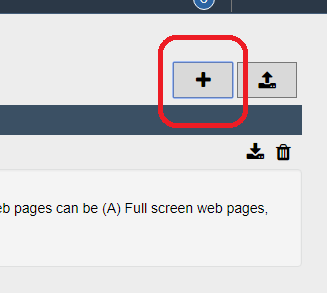
Click the “Add New Add-In” button on the top right.
Fill out the Add-In form with the pertinent information. More information about each field is listed below.
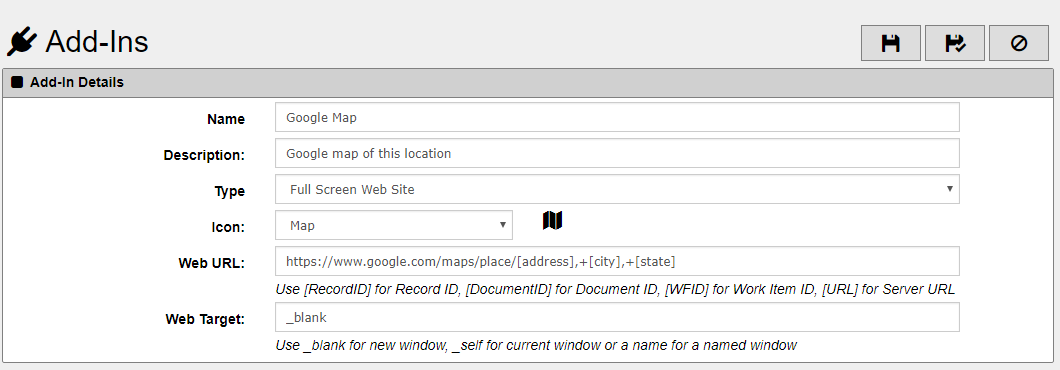
Add-In Details
Name – The name that will be shown on all the Add-In buttons for this Add-In.
Description – This is shown as the hover tool tip for the buttons.
Type – This is where you specify the type of Add-In you wish to use. The other questions that appear will depend on the option you select here.
Actions Only – Only performs the Automation Actions and does not call up any other interface.
Windows Application – Fully compiled Windows application that will be downloaded and run locally.
Windows Add-In DLL – A Windows DLL that inherits from the docMgt.Web.Addin class.
Full Screen Web Site – A link that will open a new window to the URL you specify.
Embedded Web Page – A link that will open a window inside of the docMgt window, leaving the tool bar intact.
Pop-Up Window – A link that will open a URL inside a pop-up window in docMgt.
Version – Use the version field if you need or want to keep track of which version of the Add-In is installed. This is not important for web-based applications but for Windows applications this is very important. Windows applications are downloaded to the local computer to be run. If the version of the application is already downloaded it will not be downloaded again. Therefore, if you do not change the version number then any changes you have made to the application will not be downloaded to the users’ computers.
Icon – Select an icon that most closely relates to your Add-Ins function. This will be displayed along with the Name on the button that opens the Add-In.
App to Start – If you specified Windows Application or Windows Add-In then this this is where you would enter the name of the application or DLL to run. This application must be included in the ZIP file that is uploaded (see below).
Parameters – If you specified Windows Application then this this is where you would enter any parameters you need to send into the application. You can use variables like [RecordID], [DocumentID], etc.
ZIP File – You must upload a ZIP file that contains the entire application that you wish to run. This includes any DLLs that are required. When launching a windows application or DLL Add-In there is a self-installed helper application that downloads and executes your Add-In on the local machine. The ZIP file is downloaded automatically and extracted for use by your Add-In.
Web URL – If you specified any URL-based types this this is where you can put the URL value. You can use variables like [RecordID], [DocumentID], etc. to be able to send those IDs to the URL you are calling.
Web Target – The name of the window to use for showing the URL. Here are the standard target names – w3schools.com Link [icon name=”external-link” class=”” unprefixed_class=””].

Display Settings
Show Add-In – Where to show the button(s) for this Add-In inside the docMgt interface.
Toolbar – This will show the button(s) on the toolbar. If only Add-In is set to display here then that will be the button that shows. If more than one are to display then a drop-down menu of available Add-Ins is shown.
Record – This will show the button(s) on the Record screen in the Information panel. If only Add-In is set to display here then that will be the button that shows. If more than one are to display then a drop-down menu of available Add-Ins is shown.
Document – This will show the button(s) on the Record screen in the Documents panel. If only Add-In is set to display here then that will be the button that shows. If more than one are to display then a drop-down menu of available Add-Ins is shown.
Show For Record Types – If you selected Record or Document above then you can specify the Record Types for which this Add-In is valid. If the user is in a Record for that Record type then this Add-In will be available.
Show For Workflow Triggers – If you selected Record or Document above then you can specify the Workflow Triggers for which this Add-In is valid. If the user is in a Record and that Record is shown in the context or a Workflow Trigger and that Trigger is one you selected then this Add-In will be available.
Show Only When – You can add custom conditions for when to show the Add-In. These custom conditions include checking record values, Looking for existing documents or required documents or checking the current user’s team.

Automation Actions
Add Action – Click the Add Action button to add a new action to the Add-In. Actions perform built-in functions like updating variables. They are executed BEFORE the any interface calls are made.
Action Types:
Record Variable Update – Update a value for the currently-viewed Record. This is ignored if no Record is being viewed or if this Add-In is called from the tool bar.
Document Variable Update – Update a value for the currently-viewed Document. This is ignored if no Document is being viewed or if this Add-In is called from the tool bar.
Add Record Note – Adds a note to the currently-viewed Record. This is ignored if no Record is being viewed or if this Add-In is called from the tool bar.
Add Document Note – Adds a note to the currently-viewed Document. This is ignored if no Document is being viewed or if this Add-In is called from the tool bar.
Search and Update – Searches the system for Records and updates the current Record with data from the found record(s) or vice versa. This is ignored if no Record is being viewed or if this Add-In is called from the tool bar.
Initiate Workflow – Starts workflow on the currently-viewed Record. This is ignored if no Record is being viewed or if this Add-In is called from the tool bar.
Save Current Data – Saves the current state of the currently-viewed Record. You can use this to be sure the user has saved all changes before initiating another action that might rely on those variables. This is ignored if no Record is being viewed or if this Add-In is called from the tool bar.
Using The Add-In
Once you have an Add-In defined and ready, there will be a button either on the top tool bar of docMgt or in the Record screen of the Records that match the criteria you defined.
Add-In Example
In the example below we defined a button that opens a new tab to Google Maps that shows a map of the location in the Record. We used a Web URL enrty of “https://www.google.com/maps/place/[address],+[city],+[state]” to perform this link. Notice the [address] and [city] variables. These will take whatever the value is in the [address] and [city] field in the Record and use them in the URL.
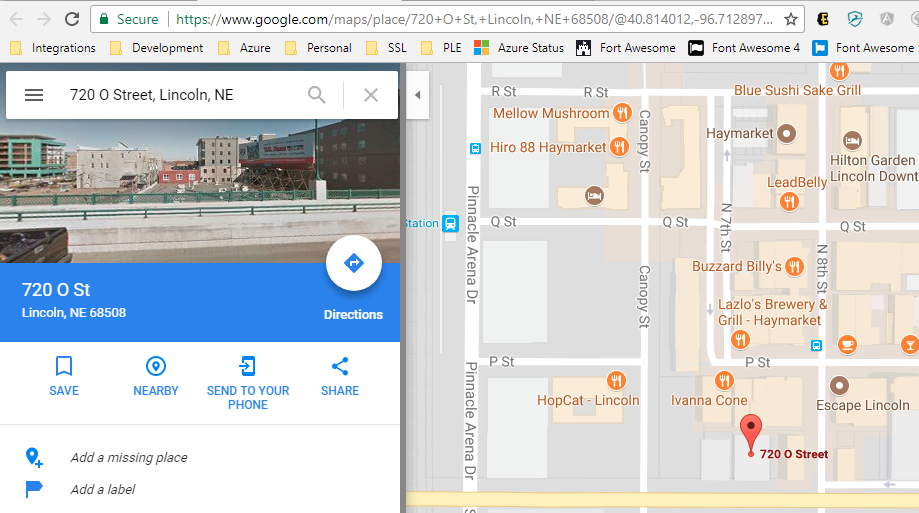
When the user clicks on the Google Map button they will get a new tab in their browser that takes them to a Google Map of the address in the Record.
Display Settings
Sometimes you want to control when the add-in shows up. Maybe it is only for use by supervisors or maybe it is only usable when the current Record has specific values set. The Display Settings section allows you to manage when to display the add-in.
In the example above we only want to show the Google Map button when we are in a Personnel Record and not in the context of workflow. We also only want to show the button if we have the values in the Record that are necessary to show the map. To do this you can set the Display Settings values as follows.
Automation Actions
And of course there are also times when you need to perform simple built-in actions when the button is clicked such as changing data, adding notes and initiating workflow. That is where the Automation Actions section comes into play.
In this example we are going to also log the last user who viewed the map and when they viewed it. To do that we will add two Record Variable Update automation actions – one for each value.
NOTE: We used the [DATE] and [USERFULLNAME] variables to get information about the current user and date. For more information on variables read our article about eating your vegetables variables.
Summary
This feature was added to enable you to extend and complement the current docMgt functionality. The ways you can use it are unlimited. As you use it we would love to get feedback from you. Please contact us with any comments or suggestions on making this the best feature possible.