
Building a Contact Us Workflow – Step by Step
In our previous post, Step-By-Step: Contact Us Form, we discussed the creation of a Contact Us Form and how to publish that for use on your Web site. In this article we will extend that lesson and discuss how to route the incoming form so that it will be logged and worked without getting lost in your email inbox.
Creating The Workflow
Step 1: Decide on Form Routing Rules
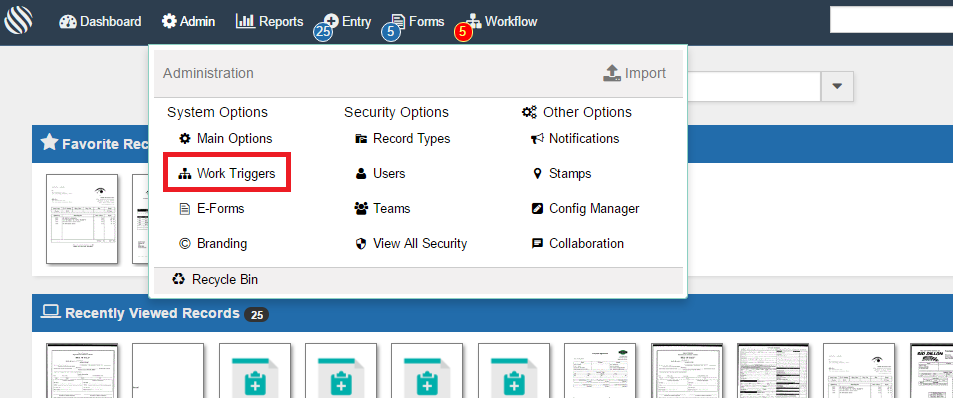
The first thing you need to do is figure out who gets the form when it comes into your company. For this example we will be doing a simple two-step workflow – incoming review and outgoing response. To get started, click the Admin button in the top toolbar then select Work Triggers in the drop down screen. This will take you to the list of Work Triggers already in your system.
Step 2: Incoming Review Trigger
The first Work Trigger should be designed to catch incoming forms so they can be processed and reviewed. For this to work properly we need to evaluate routed items to figure out (A) if they are Contact Us forms and (B) if they have already been reviewed. We can use the Record Type we designed in the first article for item (A). For item (B) we will use a Status field. Even though we do not have a defined Status field we can still use one behind the scenes. We will demonstrate this technique as well.
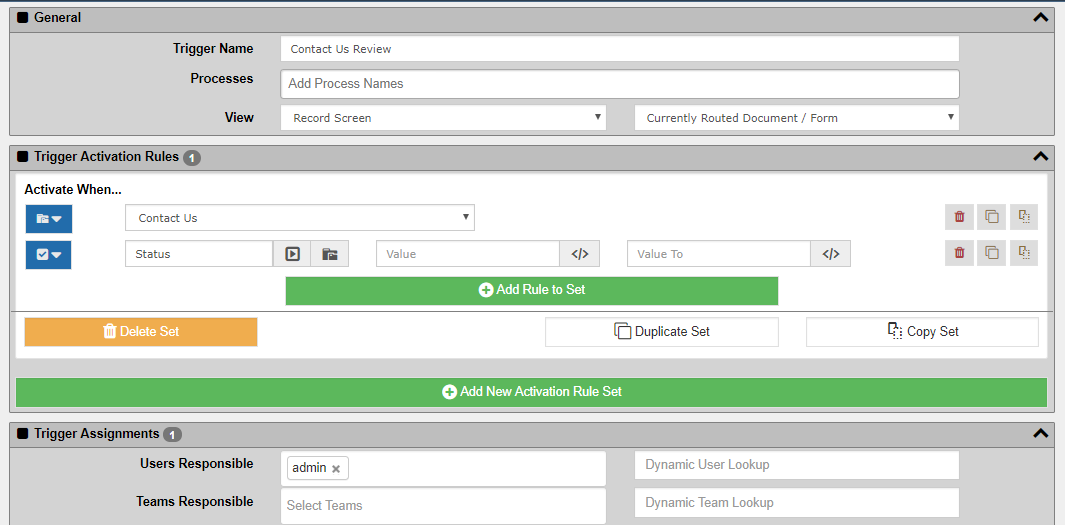
Click the ADD button from the Work Trigger list screen to add a new Work Trigger. For the name use “Contact Us Review.” In the “Trigger Activation Rules” section, set the options as shown below. Record Type Check = Contact Us. Value Check = Status = (no values). Assign the step to whomever should receiving the incoming Contact Us forms for review.
Trigger Activation Rules
The Trigger Activation Rules tell the system when this trigger should be used. Our settings tell the system that only if the incoming information is of the Contact Us record type and the Status field is blank. We are assuming that no Status is being set on the way in (because our form does not use a Status field) so leaving both the From and To values empty will ensure we match a blank Status value.
User Buttons Available
Once the Trigger has been activated the employee will get an alert and they can then open the form using the links in the email alert or their toolbar. Once they open the form they need to have some options as to what they can do. We will give the reviewer two options – OK and Junk. This way they can filter out the good contacts and discard the junk ones.
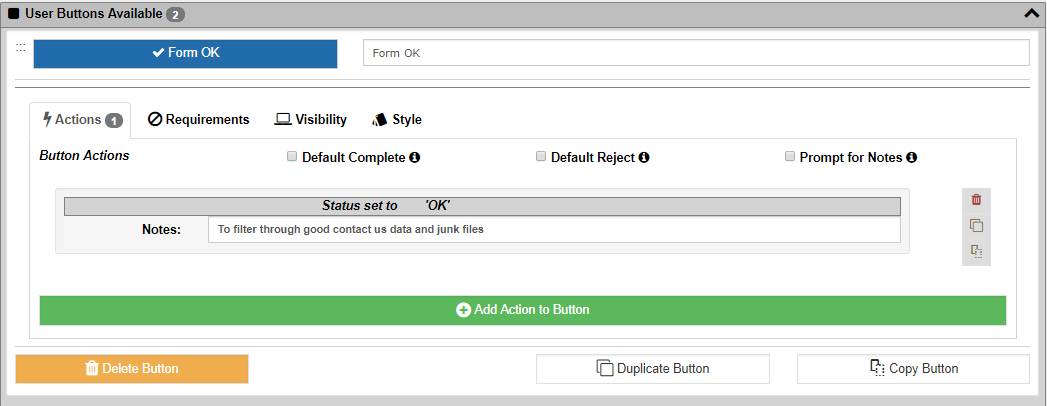
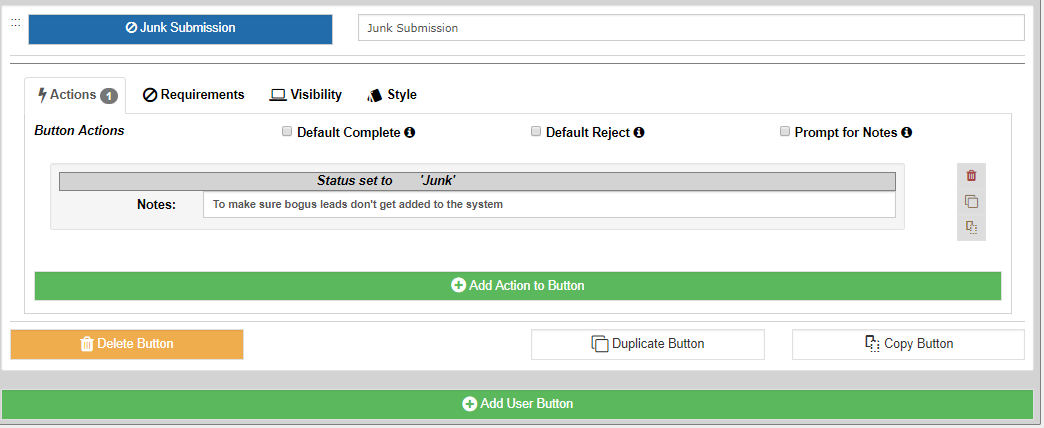
The first button is what the employee will click once they determine the form is valid. This will set the Status field to OK. The second button will set the Status field to Junk. No matter which button they click, the workflow will proceed to the next Work Trigger. Save and close this Work Trigger.
What we want to do next is to “catch” the form at the next step of the process for further processing.
Step 3: Outgoing Response Trigger
The second Work Trigger should be designed to catch forms that have been determined to be OK. We do this by configuring the trigger to look for Contact Us forms with a Status of OK.
Click the ADD button from the Work Trigger list screen to add a new Work Trigger. For the name use “Contact Us Processing.” In the “Trigger Activation Rules” section, set the options as shown below. Record Type Check = Contact Us. Value Check = Status = OK. Assign the step to whomever should respond to the user who sent in the Contact Us form.
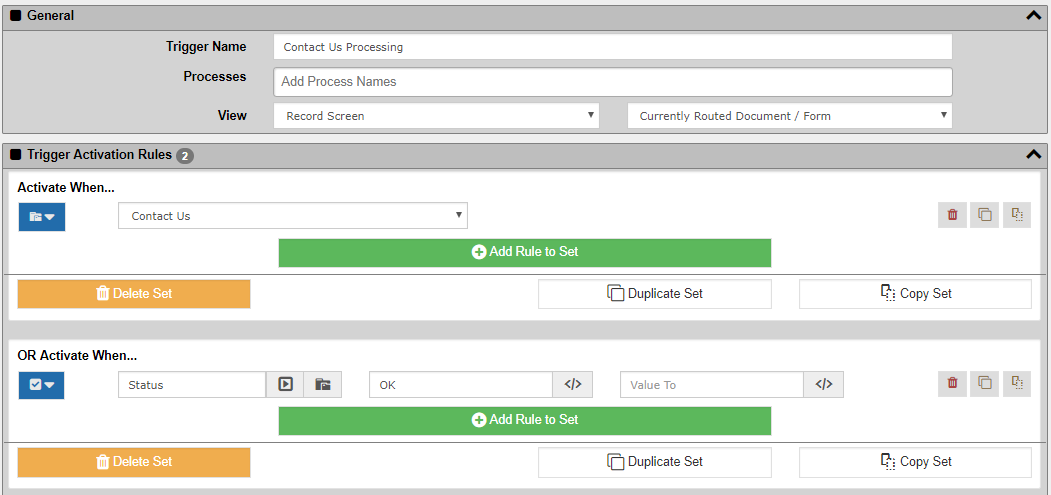
Trigger Activation Rules
The Trigger Activation Rules tell the system when this trigger should be used. Our settings tell the system that only if the incoming information is of the Contact Us record type and the Status field is set to OK.
User Buttons Available
Once the Trigger has been activated the employee will get an alert and they can then open the form using the links in the email alert or their toolbar. Once they open the form they need to have some options as to what they can do. We will give the reviewer only one option – Done.
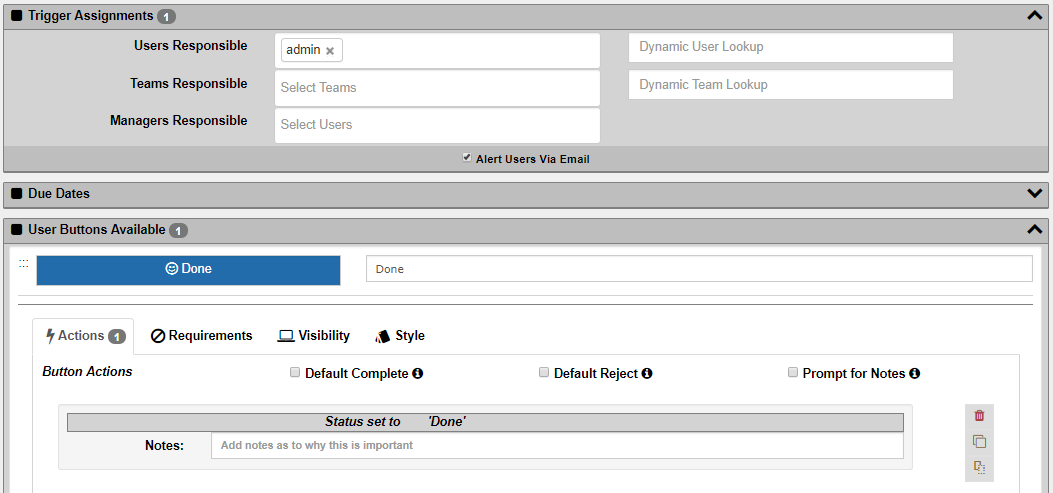
The button is what the employee will click once they are done working with the user. This will set the Status field to Done. When the employee clicks this button the workflow will proceed to the next Work Trigger. Save and close this Work Trigger.
One important thing to note is that workflow does not have to do “everything” for the employee. Typically just getting the information to the right employee on a set schedule is enough to add tremendous value to a process. In this scenario you will notice that we did nothing but give the employee a DONE button. The assumption is that the employee will email or call the customer and once they are done they will click the Done button. The employee can or should log all interactions into the Notes section of the Record so there is a log of the call and the outcome.
Since the Status field will be changed to “Done” this will make sure the workflow will complete since it will no longer find a matching trigger. In other words, we do not have a trigger configured to look for Contact Us forms with a Status of Done so that finishes the workflow.
Changing the E-Form
Now we have an operational workflow and an E-Form that we can publish. The last piece of the puzzle is to make sure the form gets routed when the outside user submits it. If we do not do that then the form will be saved but nobody will be notified and it will most likely get lost. In order to route the E-Form, open the E-Form and make a couple changes to the settings on the right side, under the Advanced Settings panel.

Turn on the “Route New Form” to ensure that the form gets submitted when saved. You can also turn on the “Only on New Record” setting to ensure that if you create a new form inside an existing record that is skips the routing logic. This last step is not important in this scenario. Now save the form and you can test.
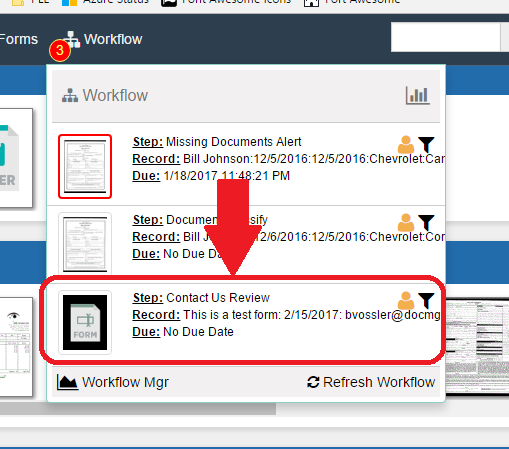
Once you submit a new form you should see the form come into the workflow. Check your toolbar for new workflow items and you should see the item come in.
Summary
There you have it – a working Contact Us form complete with Workflow. The triggers we designed were for a simple scenario. Make sure to experiment by adding additional triggers for the form to do things like moving it to Technical Support (set Status to Tech Support and make a trigger to watch for that) or to Customer Service or Sales. Each one could just be a different Status value.